Building Flutter PullToRefresh in just 15 minutes
Introduction
The pull-to-refresh pattern lets a user pull down on a list of data using touch in order to retrieve more data. The “Pull-to-refresh” gesture was first introduced by Loren Brichter in the Tweetie app and in no time it became so popular that countless apps adopted this gesture. Today “pull-to-refresh” feature is a natural part of many popular apps, including Twitter, Gmail, Tweetbot and others.
What you’ll build?
In this tutorial, you’ll build a mobile app featuring a PullToRefresh gesture using the Flutter SDK. Your app will:
- Display a dynamic list with a random number of items
- Each time you PullToRefresh the no of items will change in the list
This tutorial focuses on adding a PullToRefresh gesture to a Flutter app. Non-relevant concepts and code blocks are glossed over and are provided for you to simply copy and paste.
Github Repository | @ShivamGoyal1899
A Flutter app featuring PullToRefresh. Contribute to ShivamGoyal1899/PullToRefresh development by creating an account…github.com
Widget In Focus | RefreshIndicator
Setting up Flutter on your machine
The detailed steps to install Flutter on your personal computer & getting started with Flutter is available at the following blog
Learn what is Flutter and how to set it up on Windows and Mac systems and get started with Flutter appsmedium.com
Coding the component
Component Syntax
The basic format of PullToRefresh gesture looks like the one below:
const RefreshIndicator({
Key key,
@required Widget child,
double displacement: 40.0,
@required RefreshCallback onRefresh,
Color color,
Color backgroundColor,
ScrollNotificationPredicate
notificationPredicate: defaultScrollNotificationPredicate,
String semanticsLabel,
String semanticsValue
})
Implementation
The most generic way to implement PullToRefresh is as follows:
const RefreshIndicator({
Key key,
@required this.child,
this.displacement = 40.0,
@required this.onRefresh,
this.color,
this.backgroundColor,
this.notificationPredicate = defaultScrollNotificationPredicate,
this.semanticsLabel,
this.semanticsValue,
}) : assert(child != null),
assert(onRefresh != null),
assert(notificationPredicate != null),
super(key: key);
Importing dart libraries to main.dart file
Import dart:async & dart:math libraries to your main.dart file by adding the following line at the starting of the file:
import 'dart:async';
import 'dart:math';
Putting Code in action
Amend your main.dart file as per the following code:
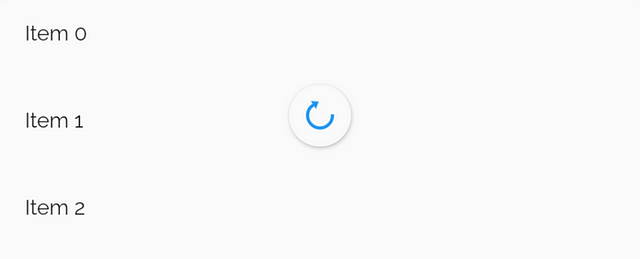
Building & running the application
- Connect your Emulator or physical Android device to test the application.
- Click on Build & Run.
- And Boooom, your app is ready.
The final build would look like the below illustration.