How to Deploy Node Server / Flask Server on Heroku

Table of Contents
- How to Deploy Node Server / Flask Server on Heroku
- What is Deployment/Hosting?
- About Node JS
- About Flask Server
- Create a Heroku Project
- Setting up Node JS Server and Deploying to Heroku
- Setting up Flask Server and deploying on Heroku
- Conclusion
- Next Steps
- Ionic React Full App with Capacitor
- Ionic Capacitor Full App (Angular)
- Ionic Full App (Angular and Cordova)
How to Deploy Node Server / Flask Server on Heroku
In this tutorial, we will be covering 2 kinds of server deployment on the Heroku Cloud platform :
We will also show – how easy it is to write a server code from scratch, deploy it online for the first time and update the server after the first deployments. you can just use the simple git command to deploy the latest code.
Both the **Node Server **and Flask Server have different steps to get deployed on Heroku. First, we will look at the Node Server and then the Flask server. Before going through the steps, we will take some basic knowledge about these technologies. And will also look at what do we mean by deployment?
What is Deployment/Hosting?
Any web-related app goes through several steps until it is available for the users. Generally, we work on our local system (mostly named as localhost) for coding the server. However, we need to send this code to a server that is associated with a publicly visible URL (not necessarily, it can be private also for some apps). From there we can access this Server’s applications like – webpage, API, or any webhook through a URL. This is called deploying the Server code. Traditionally this was done with the help of a Linux Server, which will run an HTTP Server. This Linux Server is used to be associated with a public URL or IP address. All this setup used to take a lot of effort to prepare and manage my own server. But now mostly we will use Cloud Platforms to manage such deployments/hosting.
There are several tools that can be used to deploy any kind of software or application or any site:-
- Bamboo.
- Heroku.
- TeamCity.
- AWS CodeDeploy.
- Octopus Deploy.
- ElectricFlow.
- PDQ Deploy.
- Ansible Tower.
- Chef and more ….
Now we know enough about the deployment, we will directly jump to deploying code of NodeJS. Before that, a small introduction about NodeJS, feel free to skip that section, if you already work on NodeJS.
About Node JS
Node.js is an open-source, cross-platform, back-end JavaScript runtime environment that runs on the V8 engine and executes JavaScript code outside a web browser.
As an asynchronous event-driven JavaScript runtime, Node.js is designed to build scalable network applications. Node JS is easily deployable to the Heroku, we only need to run some of the Heroku commands to the terminal and we are good to go to operate the Live server.
Once the server is deployed, we get the deployed URL (Hosted URL) which we can use in any of the Frontend applications to call the server and its APIs.
About Flask Server
Flask is a web framework for Python, meaning that it provides functionality for building web applications, including managing HTTP requests and rendering templates.
Node is more capable as it is a complete JS runtime environment, Flask is just a simple Web Server. The functionality we will use is the same as the Node JS server, the only way of writing code change We will be developing some dummy APIs to check the status of the Server.
Create a Heroku Project
Heroku is a container-based cloud Platform as a Service (PaaS). Developers use Heroku to deploy, manage, and scale modern apps. Our platform is elegant, flexible, and easy to use, offering developers the simplest path to getting their apps to market.
There are 2 parts to the Heroku Setup :
1. Settings through Heroku Cloud Dashboard
So before setting up the server scripts, we need to create a new project in the Heroku platform. Go to Heroku and then log in (if you already have an account) or signup (if you do not have the account). Once you logged in you will be taken to the Dashboard screen.

Heroku Dashboard
once you click on the new app, then it will ask you for the name of the app and to choose the region. (We will give dummyflaskserver as the app name as it will be required later)
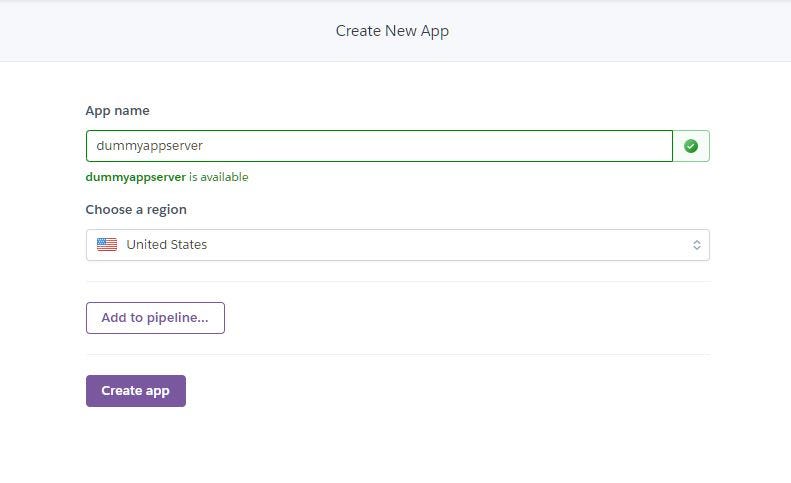
Creating new app
2. Installing Heroku CLI on your local system
Now after creating the app in the Heroku cloud, we just have to **install the Heroku CLI (command-line interface) **in our system and run some commands to deploy our server. To download the Heroku-CLI just follow the steps mentioned in this Link. After installing you can login to the Heroku through your local system by running the below command (in terminal or CMD):-
$ heroku login
The above command will prompt you to open the login window on the browser, then you can log in and it can automatically login into your system:-

heroku login command
Now we are all set with the Heroku platform and we can start with the scripts for the node server and flask server. So tighten your seatbelts, we are good to go.!

Lets Gooo…!
Setting up Node JS Server and Deploying to Heroku
This section will not teach much about NodeJS Server programming, but still, be easy for a beginner to pick up. You must have Node Enviroment already setup on your system – and command line should run “npm” & “node” without any issue.
To create a Node JS script, we will create an index.js file and run npm init in the working directory (this will create the package.json file in the project).
$ npm init
the above command will create the _ _package.json file in the working directory and then you can create the index.js file (All logic will be contained by index file). Once you have run the above command, the project structure will look like this:-

Project Structure
Before implementing dummy APIs, we have to install some of the libraries that will help in implementing node script. To install the libraries run the below command:-
$ npm install _body-parser cors express_
To know more about body-parser, cors, and express you can follow the links. Now we have all the basic requirements to start our node script.
Note – Check your project’s package.json file, it should contain the value stated below in the scripts section:-

package.json file
Now we will write a dummy API that can be used to check whether the server is deployed properly or not? We will hit the API from the browser using the deployed URL and check it response.
Now we have to initialize a GIT repository, and when we push code into repo it will automatically update the code in Heroku. Important Note:- Heroku creates its own repository parallel to the GIT repository and maintains the latest code into it.
In the above code, we have simply added a /status API that will be used to check the status of the server. If that API responds to the request, then our server is working.
First, create a new Repository in Github, then run the below commands to push the code into the Git Repo.
$ git init
    $ git add .
    $ git commit -m "message"
    $ git remote add origin <repo_url>
    $ git push origin master
The above command will push the code in Github repository, now to deploy the code to Heroku run the below command under Heroku-CLI:-
$ heroku git: remote -a <app_name>
    $ git push heroku master
If you cannot find your app name (In our case it is dummyappserver)** – **you can go to the deploy section under the app, in Heroku Dashboard. The first command, **heroku git: remote -a <app_name> **will add a remote path using the app name. And the last command i.e. **git push heroku master **will push the code to Heroku remote. It will automatically start the build process, generate a node environment in the Heroku platform, and returns the deployed URL. Now we can check our server is working or not by hitting the API using /status endpoint:-

Testing Deployed URL
Setting up Flask Server and deploying on Heroku
Please switch to a different Project folder, before starting this section as it has no relation with the NodeJS code or Project.
This section will not teach much about Python Flask Server programming, but still, be easy for a beginner to pick up. You must have Python Enviroment already setup on your system – and command line should run “python” and “pip” or “pip3” command.
Before creating the script, we will create and configure another Heroku app, different from the NodeJS one. To create an app click on create the app

Creating new app
Once a new app is created (with dummyflaskserver as app name), we have to configure i.e. to add the Python build packs in the Heroku platform. You can go to the setting tab to get the option:-
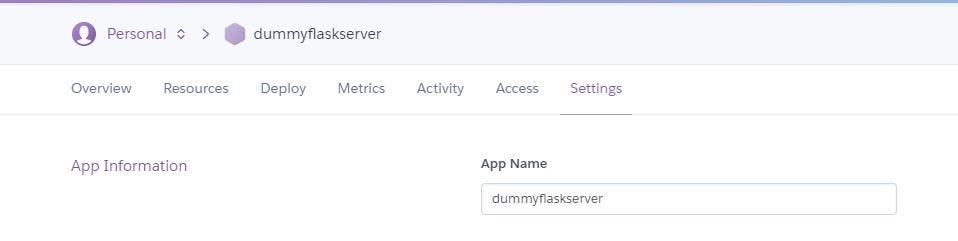
Settings Tab
You can find the adding the Buildpacks options in the settings and add the Python package to it.

Buildpacks option
Click on Add Buildpack, and choose the Python as the option:-
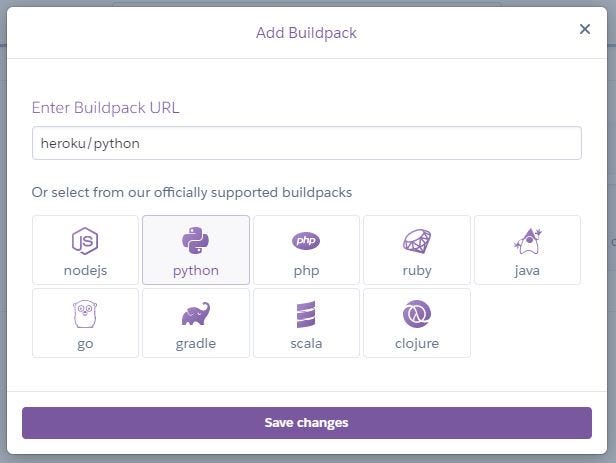
Adding Python to Buildpack
We have configured the Heroku app, now we can start with setting up the flask server. First, we will create a file named app.py that will be the file containing the APIs (Note – choose app.py as the name of the file).
Before continuing you have to keep note, you must have Python preinstalled on your PC. If you have already installed the Python then run the below command to install the flask packages (pip3 can also be pip in your system):-
$ pip3 install flask
    $ pip3 install flask_cors
    $ pip3 install gunicorn
once all the packages are installed, then create the app.py in the working directory. Please take care of indentations, as this is Python.
In the above python script, Firstly, A flask app had been initialized and after that CORS has been be enabled in the server. We have added** index()** function that returns the String “Status OK”. This index function is called whenever someone hits the /status endpoint. We have followed the function-based pattern for the flask script (You can follow Class-based pattern if you like).
Now to deploy the code to Heroku we have to configure some of the files in the Flask project like Procfile, requirements.txt, and runtime.txt. These files will help Heroku to know more about the project.
- **Add Procfile to the Project:- In this ** file, we have to add the below line that will configure the app and help to run the server instance.
web: gunicorn app:app
app: <app_name>:- this app_name will be the server instance that we have defined in app.py. Ex. ’ web gunicorn dummyflaskserver:app’ (dummyflaskserver is the app name used in our case).
2. **Add requirements.txt file to the Project:- **This file contains the requirements or the packages used by the Flask server. To generate this file use the below command:-
pip freeze > requirements.txt
3. **Add the runtime.txt file to the Project:- **This file will let Heroku know which Python version to use in the environment. we have to add the below line to the file.
python-<version>
This version can be 3.7.6 (python-3.7.6)or anything installed in your system, you can check it using the below command (use **python3 **instead of **python command ** if you have also python 2):-
python --version
After we have added all these files to the Python project, the project structure will look like this:-

Project Structure
Now we have to repeat the same steps to push this code to the Github Repository and will add the Heroku branch to it. To push the code to Github, run the below command:-
$ git init
    $ git add .
    $ git commit -m "message"
    $ git remote add origin <repo_url>
    $ git push origin master
And now we will push the code to the Heroku by running the below command into the project directory:- (dummyflaskserver is the name used while setting up the Heroku application in the dashboard)
$ heroku git:remote -a dummyflaskserver
    $ git push heroku master
Heroku push command will return the deployed URL, that can be used in any of the font-end applications or any other servers. We will hit the URL using browser:-
Hitting the URL
Conclusion
We have learned how to write simple NodeJS or Flask Server codes and deploy them to the Heroku platform. It is one of the important steps after the local development phase. If you want to know more about any of the features or any technology you can visit Enappd Blogs.
Next Steps
If you liked this blog, you will also find the following Ionic blogs interesting and helpful. Feel free to ask any questions in the comment section
- Ionic Payment Gateways – Stripe | PayPal | Apple Pay | RazorPay
- Ionic Charts with – Google Charts| HighCharts | d3.js | Chart.js
- Ionic Social Logins – Facebook | Google | Twitter
- Ionic Authentications – Via Email | Anonymous
- Ionic Features – Geolocation | QR Code reader| Pedometer
- Media in Ionic – Audio | Video | Image Picker | Image Cropper
- Ionic Essentials – Native Storage | Translations | RTL
- Ionic messaging – Firebase Push | Reading SMS
- Ionic with Firebase – Basics | Hosting and DB | Cloud functions
Ionic React Full App with Capacitor
If you need a base to start your next Ionic 5 React Capacitor app, you can make your next awesome app using Ionic 5 React Full App in Capacitor

Ionic 5 React Full App in Capacitor from Enappd
Ionic Capacitor Full App (Angular)
If you need a base to start your next Angular Capacitor app , you can make your next awesome app using Capacitor Full App
Capacitor Full App with huge number of layouts and features
Ionic Full App (Angular and Cordova)
If you need a base to start your next Ionic 5 app, you can make your next awesome app using Ionic 5 Full App
Ionic Full App in Cordova, with huge number of layouts and features