No Code AI API: Turn Your PDFs into Support Bot Backend
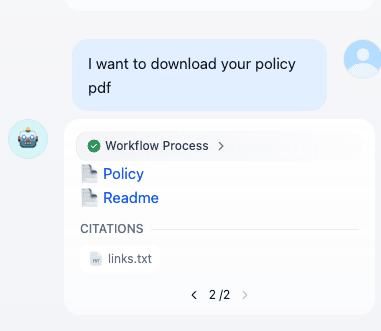
Table of Contents
- Motivation
- AI Backend-as-a-Service (AI-BaaS)
- Understanding the AI Stack
- The Goal: What We Are Building Today
- Prerequisites
- Step-by-Step Guide to Create Chatflow
- Phase 1: The Data Setup
- Phase 2: The Chat Flow - on Canvas
- Dify Node
- Step 1: The Start Node
- Step 2: The “Traffic Router” (Question Classifier)
- Step 3: Branch A - The Asset Library (Top Path)
- Step 3.1: Knowledge Retrieval Node (ASSET LIBRARY)
- Step 3.2: LLM Node (LLM)
- Step 3.3: Answer Node (ANSWER)
- Step 4: Branch B - The Support Knowledge (Bottom Path)
- Step 4.1: Knowledge Retrieval Node (SUPPORT)
- Step 4.2: LLM Node (LLM 2)
- Step 4.3: Answer Node (ANSWER 2)
- Phase 3: Validation
- Publishing and Testing the API
- Connecting to the Real World (Frontend)
- Limitations and Future Advancements
- Conclusion and Resources
Motivation
You want to create a chatbot around some kind of knowledge base, which can be a mix of documents, links, and images. But you don’t have the time to spend thinking about the design and architecture of all these things. Visual workflow orchestrators like Dify solve this problem for you. It also gives you a tool to convert this kind of data flow into an API or an MCP which you can use in your desktop, web, or mobile application. It’s so easy and flexible it kind of feels like magic.
AI Backend-as-a-Service (AI-BaaS)
The old way involved a steep learning curve:
- Setting up Python environments
- Wrestling with LangChain or LlamaIndex libraries
- Managing vector databases like Pinecone
- And handling messy API keys for OpenAI.
It turns your lean mobile project into a monolithic backend headache.
Today, we are ditching that approach. We are adopting the “AI-BaaS” mindset.
In this tutorial, we will build a fully functional, RAG-powered Support Bot API without writing a single line of backend logic. We will use Dify, an open-source LLM application development platform that handles the complex “thinking” infrastructure, allowing your frontend to just make a simple API call.
Understanding the AI Stack
Before we build, let’s clarify the jargon for newbies. Understanding these terms is crucial for using the tools correctly.
1. The LLM (Large Language Model)
This is the engine—GPT-4o, Claude 3.5 Sonnet, or Llama 3. It’s great at general reasoning and chatting, but it knows nothing about your specific company data.
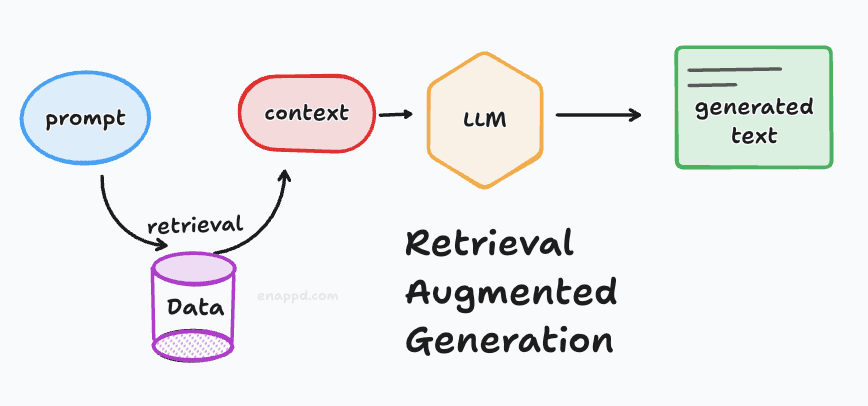
2. RAG (Retrieval-Augmented Generation)
This is the technique of giving the LLM an “open-book test.” Instead of asking the LLM to memorize your support documents, we first search your documents for relevant info, paste that info into the prompt behind the scenes, and then ask the LLM to answer based on that context. You can check out our RAG foundational blog to learn more terms—and understand vector databases, semantic similarity, retrieval, etc.
3. Orchestration
This is the glue. It’s the logic that says: “Take user input -> convert to vector -> search database -> retrieve chunks -> send to LLM -> format response.” Previously, you had to write this logic in code—today we will do it visually. If you want to understand what orchestration is, refer again to the RAG blog.

Why Dify Stands Out
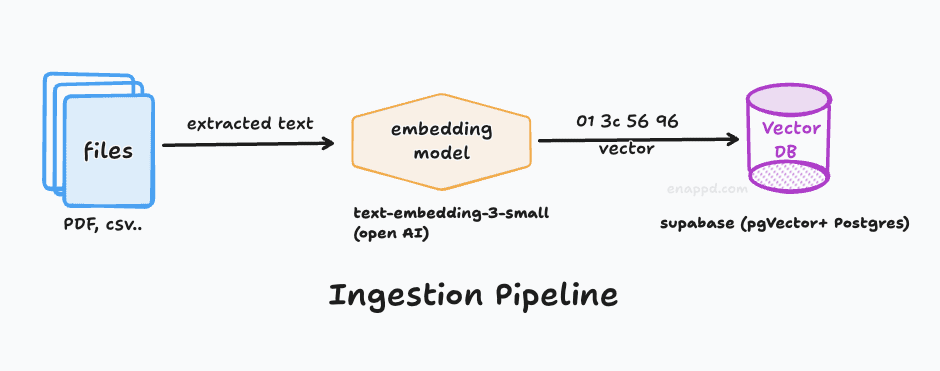
Dify is a visual orchestration platform. It replaces weeks of coding boilerplate Python. It handles document chunking, embedding, vector storage, and the API gateway layer automatically. You focus on the data and the prompt; Dify handles the plumbing. And it has many different integrations, which are popping up every day. You can check out their site for more info.
One more thing which is quite important is that Dify is completely open source. This means you can download the whole platform to your local system. Add to that, if you use a local LLM via Ollama, you can easily make a completely isolated workflow. So there is complete privacy for the work you are doing. Many companies and individuals need that kind of privacy and don’t want to upload their data to other companies’ models. Also, there is no price for those tokens—so if your use case does not demand very high-scale hardware, Dify and a local LLM are the way to go for you.
The Goal: What We Are Building Today
We are building a “No-Code Backend” for a Mobile/Web FAQ Assistant.
- Input: Your existing product PDF manuals and documentation.
- Output: An HTTPS API endpoint ready for your React Native, Flutter, or Native app.
- Functionality: The API accepts a user question string and returns an accurate answer based only on your documents.
- It can reply purely with text.
- Or it can provide the user with some kind of document to download.
- You can extend the same logic to make it a more complex chatbot.
Prerequisites
- A Dify account (Dify Cloud or a self-hosted Docker instance).
- An API Key for an LLM provider (OpenAI, Anthropic, etc.) configured within Dify’s settings. In this guide, we have used OpenAI keys, which are freely available with an initial Dify account.
- Some PDFs or text files containing the data you want your bot to know (text part). Some PDF file links which you want the user to download (assets to download). For this guide, we have used Google Drive and uploaded some of the PDFs as the documentation, and a simple Markdown file used as the knowledge base.
Step-by-Step Guide to Create Chatflow
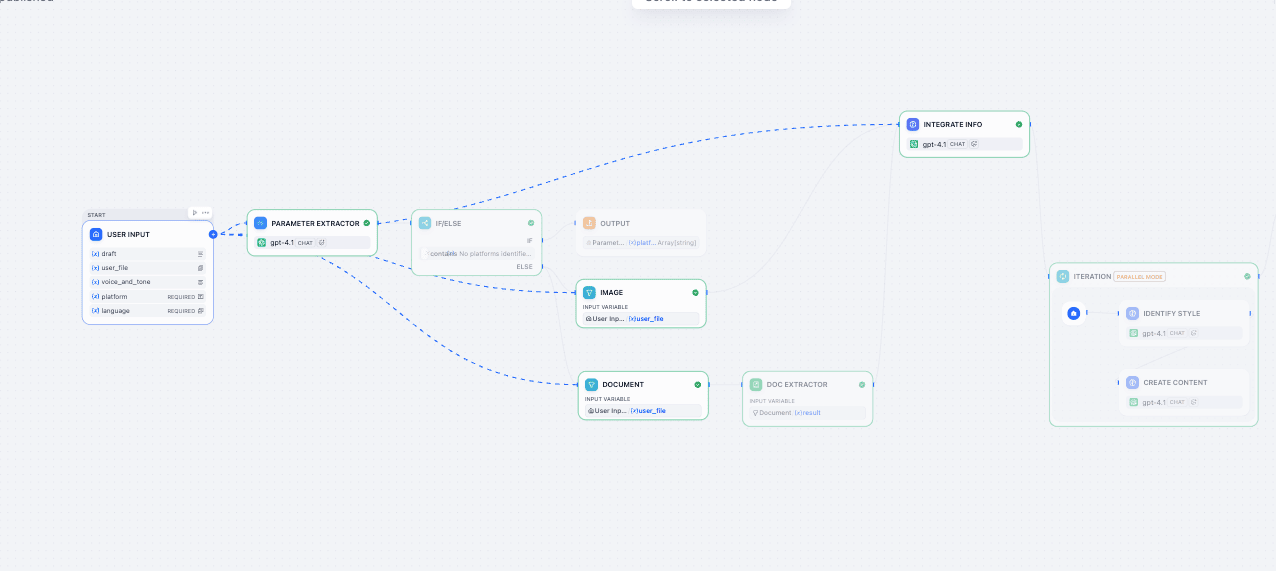
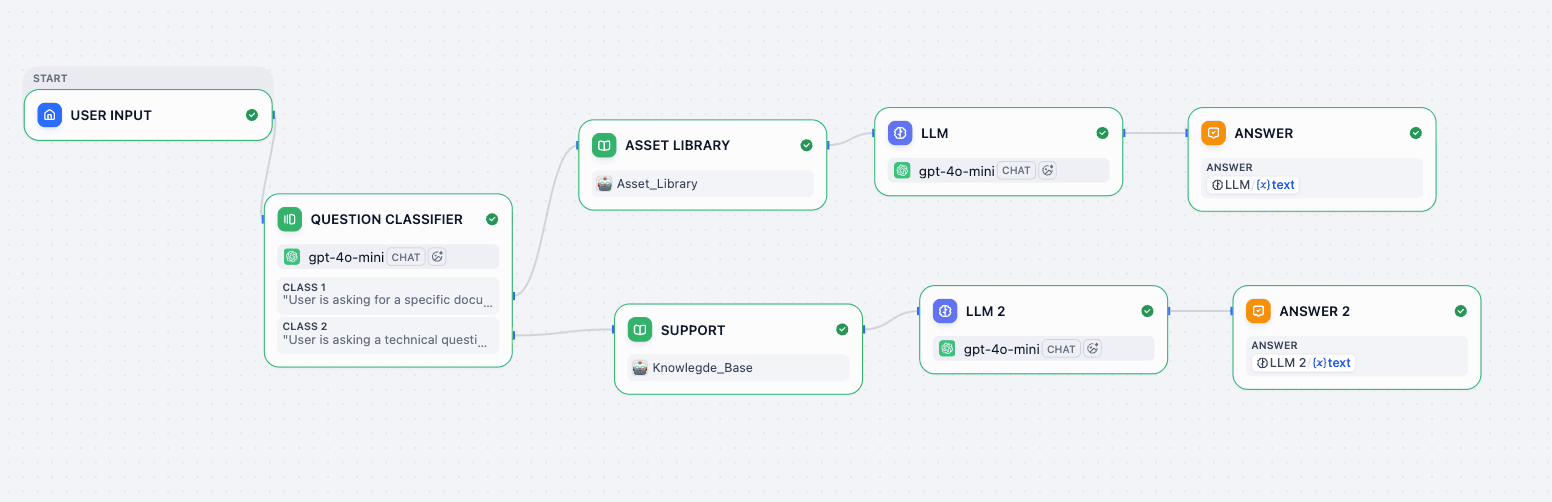
Refer to this architecture diagram as our roadmap:
Phase 1: The Data Setup
Before opening the canvas, we need to upload the “brains” of the operation.
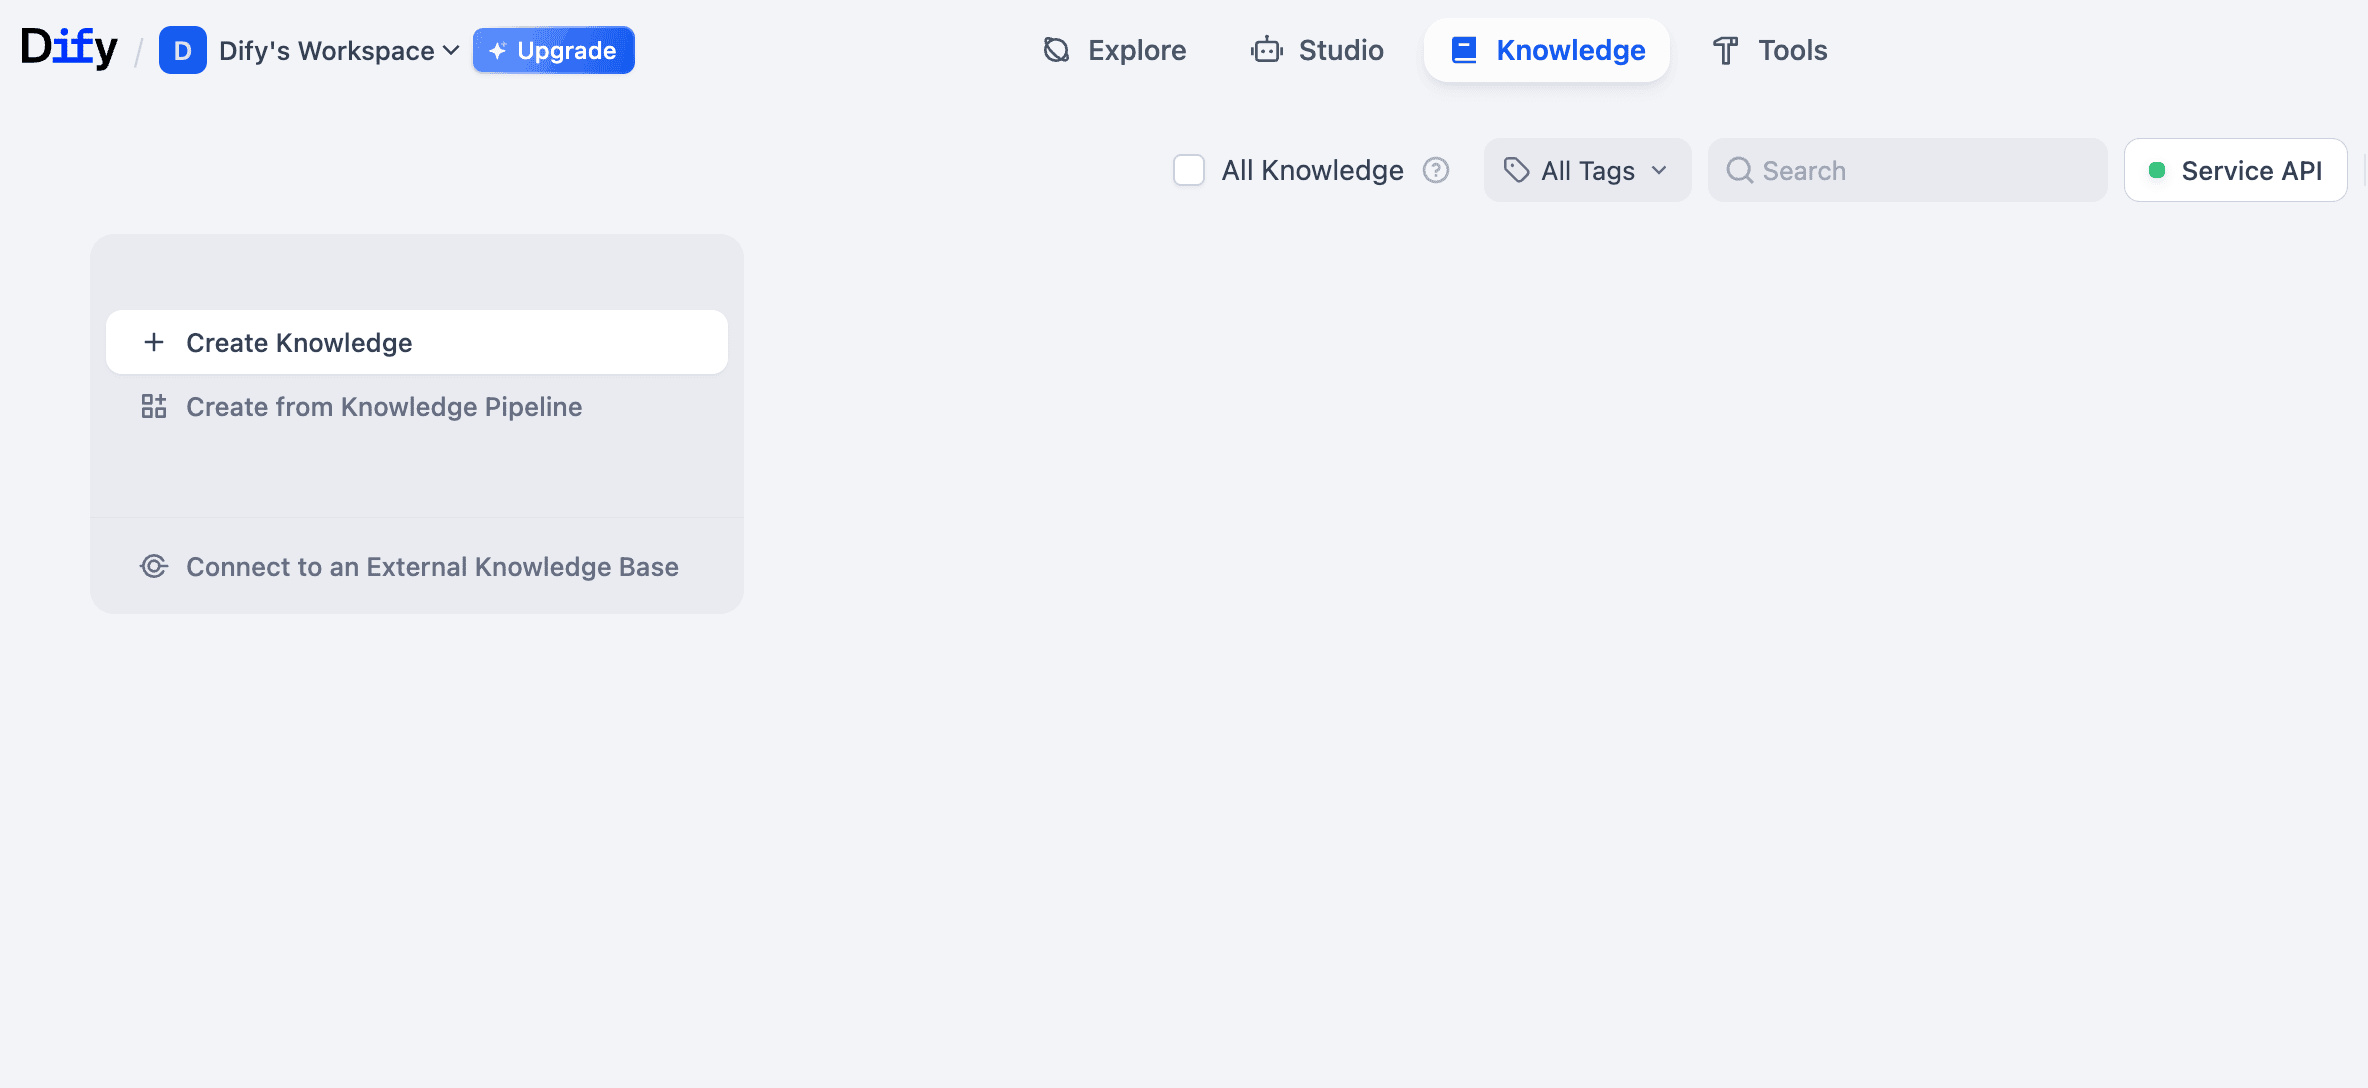
- Go to Knowledge -> Create Knowledge.
- Dataset A (
Knowledge_Base): Upload your product manuals, FAQs, and text guides.- You have to import from files; these will be the files where your text comes from. I have used a simple Markdown file which has all the FAQs about our site.
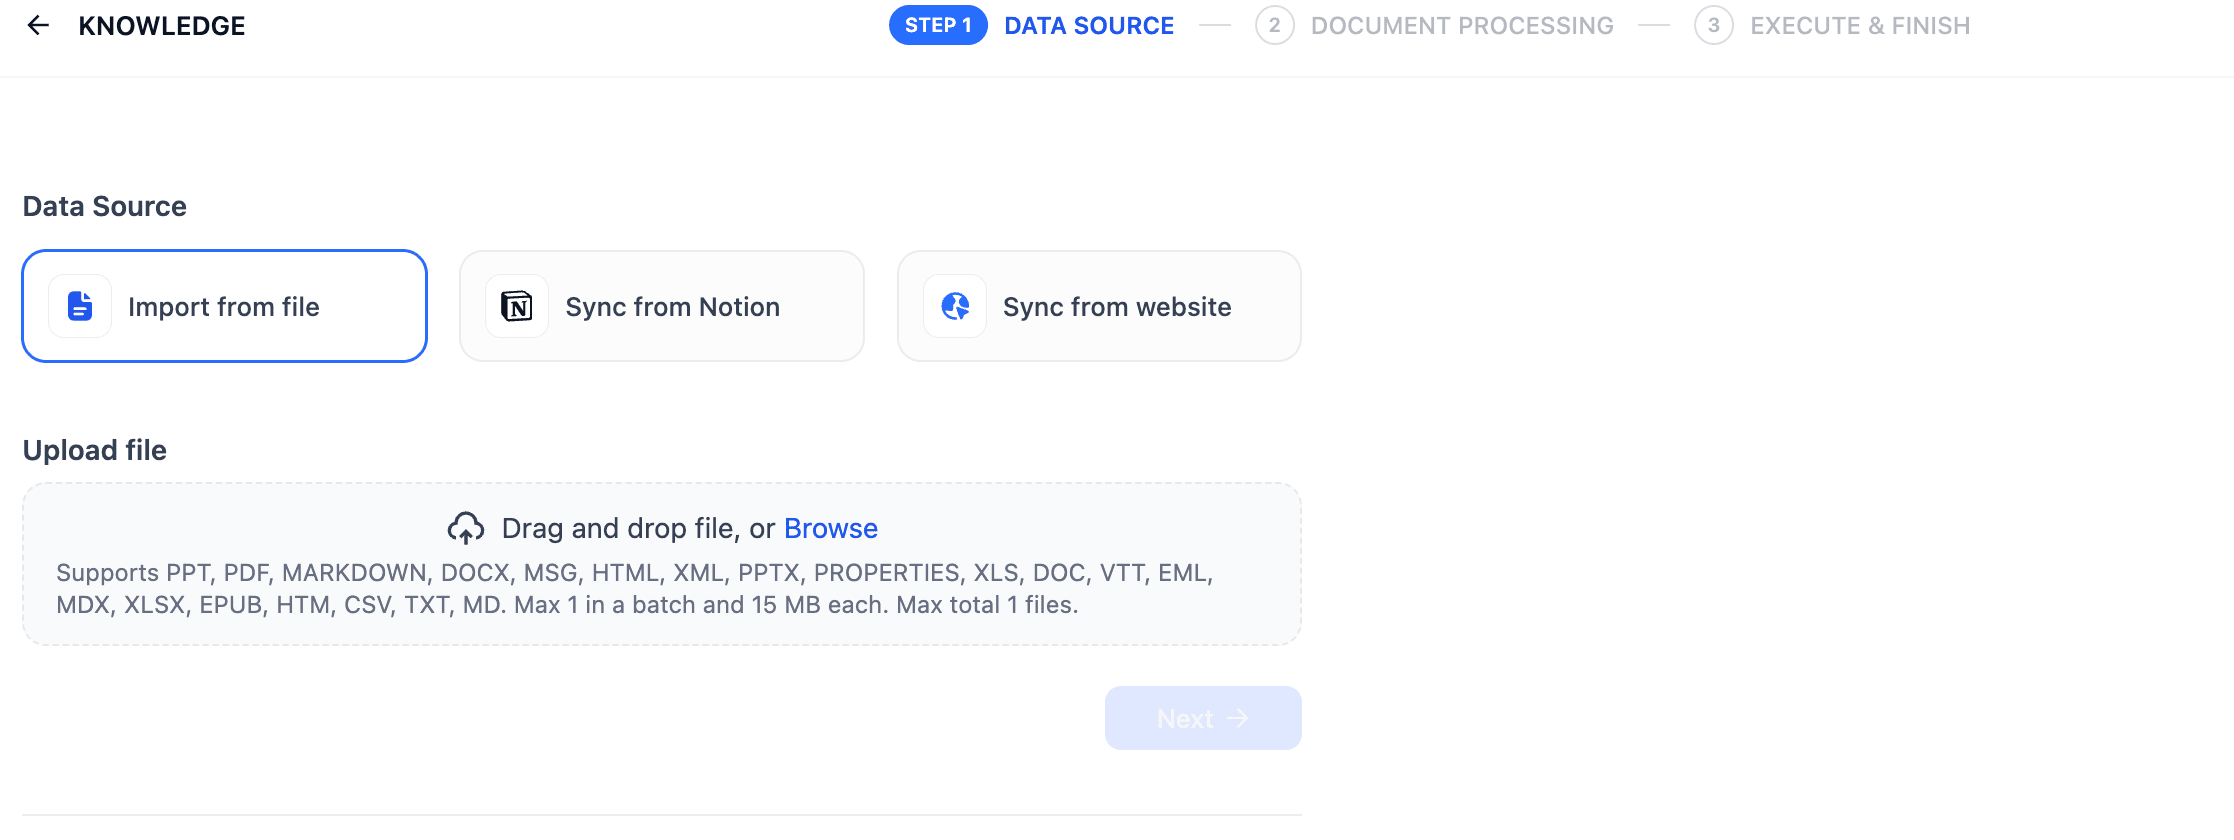
Add data source to Knowledge base - In the Data Source settings, you will get most things set by default to what we ideally want. If you want to change anything here, you can change the chunk size. There is the index method—which we want as “High Quality” because we want customers to exactly know what they are looking for rather than just getting suggestions. Also, retrieval settings can be set to vector search, which helps you find results based on similarity rather than an exact match.
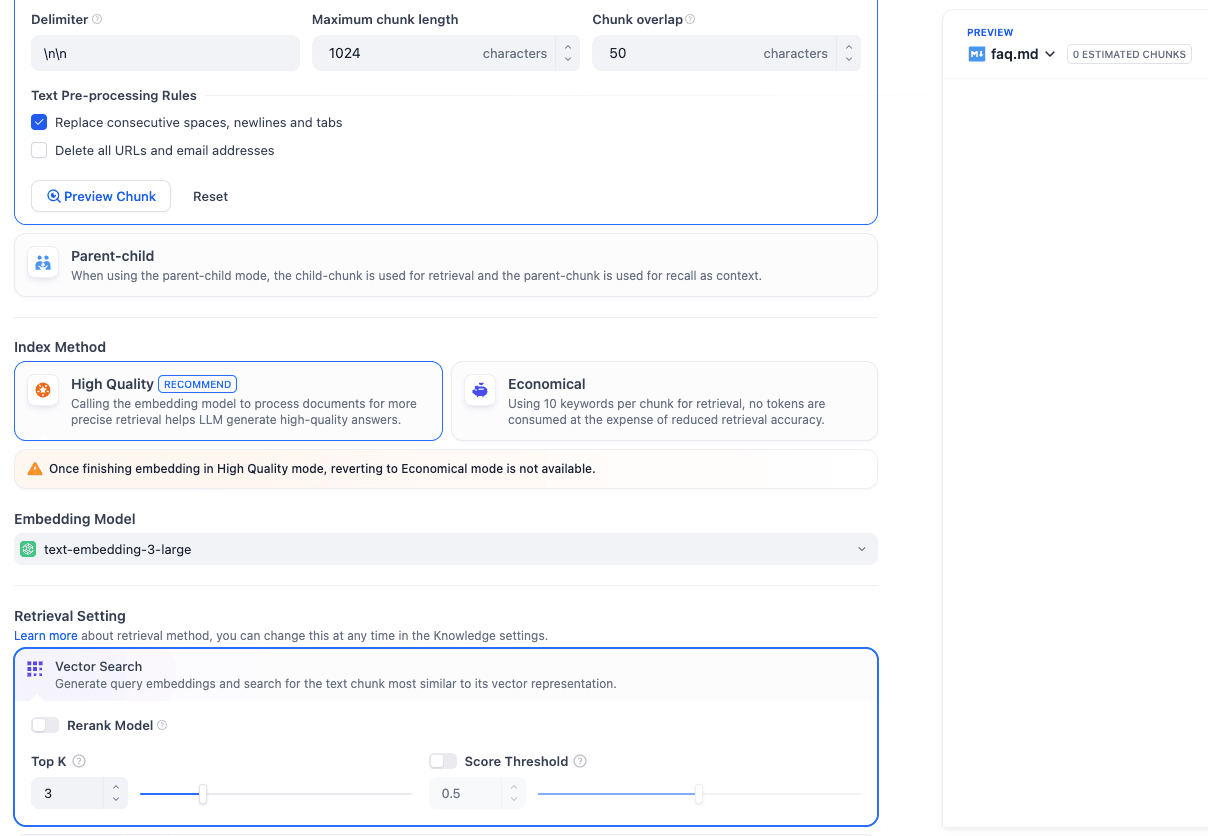
Data source settings 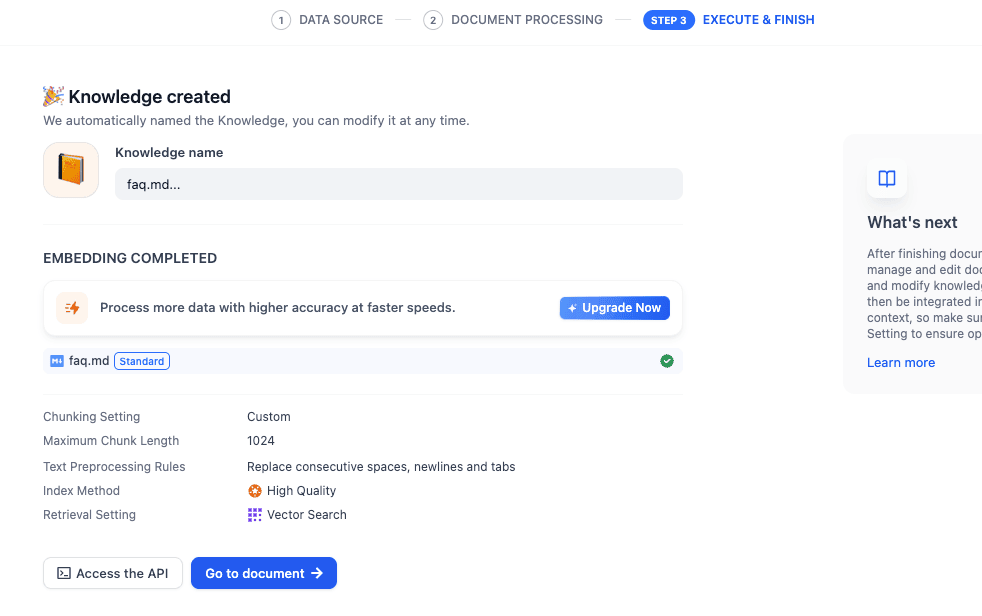
Success Page
- You have to import from files; these will be the files where your text comes from. I have used a simple Markdown file which has all the FAQs about our site.
- Dataset B (
Asset_Library): Now you have to repeat the whole process of creating a knowledge source again. This time you will upload a simple text file which contains names of some documents and their links which you want to be available for the customer to download.

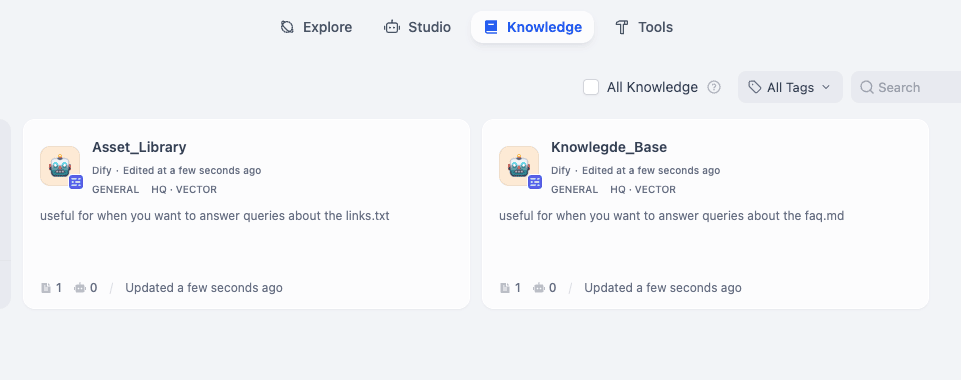
Once you are done setting up both of these knowledge sources, here’s what it will look like:
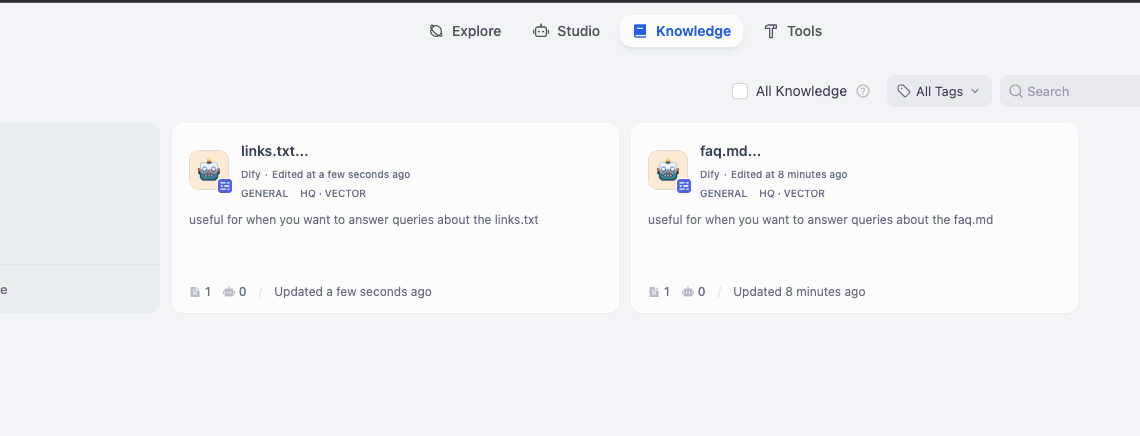
I have renamed them to Asset Library and Knowledge Base.
Phase 2: The Chat Flow - on Canvas
- Go to Studio -> Create from Blank.
- Select Chatflow (NOT Chat App). This unlocks the advanced node-based editor.
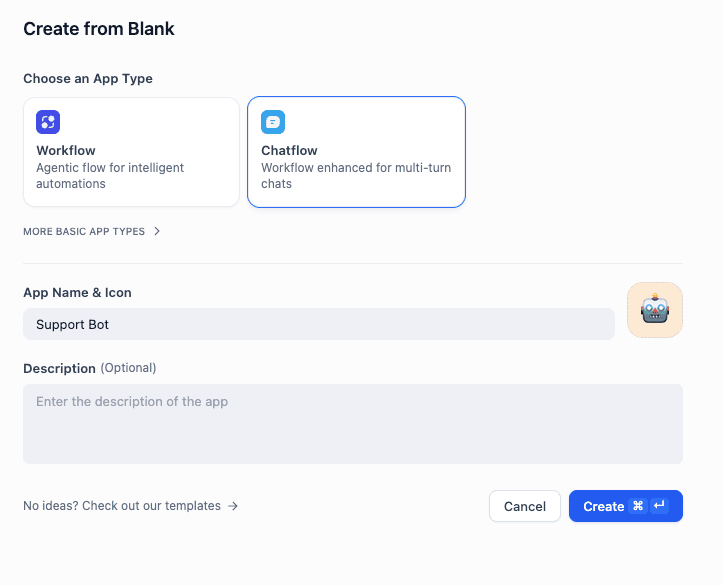
Create Chatflow in Dify
This is how the initial template will look:
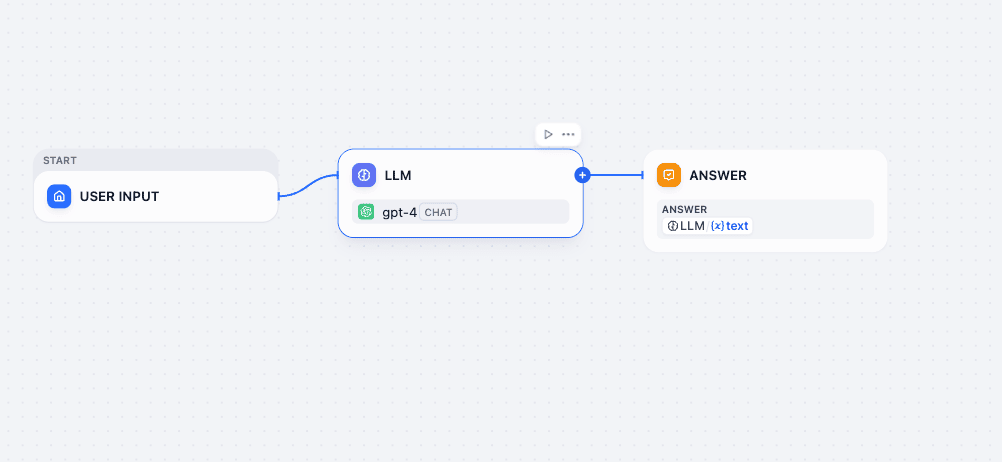
You can delete everything except the User Input to start fresh.
Dify Node
A Dify Node is a single, functional step in your AI’s logic chain. Think of it like a “Lego block” of logic. Each node performs one specific action—like “search the database,” “make a decision,” or “generate text”—and then passes its result to the next block.
In a Chatflow (the graph you are building), the entire application is just a series of these nodes connected by wires.
Let’s understand a Dify Node:
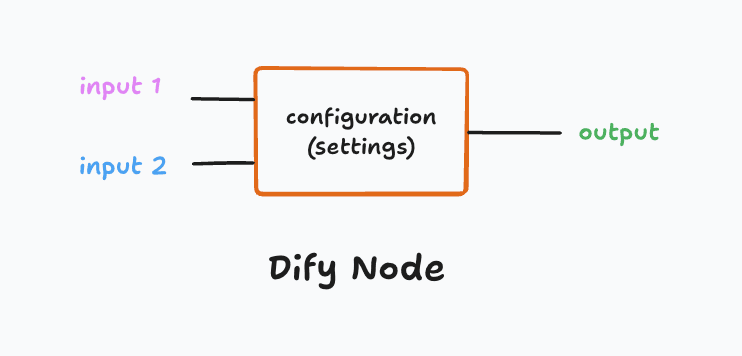
Anatomy of a Node
Every node in Dify follows the same three-part structure: Input → Processing → Output.
A. Inputs (Variables)
- What it is: The data the node receives from the previous steps.
- In Dify: You don’t type static text here. Instead, you select Variables (e.g.,
{{sys.query}}from the Start Node or{{result}}from a Knowledge Node).
B. Settings (Configuration)
- What it is: The internal rules for how the node does its job.
- In Dify: These are the dropdowns and text boxes inside the node (e.g., selecting
GPT-4oas the model, writing the System Prompt, or choosing which Knowledge Base to search).
C. Outputs (Result)
- What it is: The data the node produces after it runs.
- In Dify: This becomes a new variable that downstream nodes can use.
Now that you understand Dify nodes, let’s start building our blocks.
Step 1: The Start Node
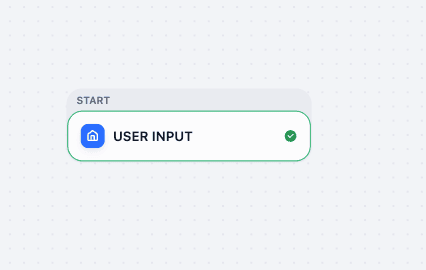
Purpose: Captures the initial message from your chat app / API input.
Settings: Ensure there is a system variable for User Input (usually sys.query). By default, it is set automatically so you don’t have to change anything.
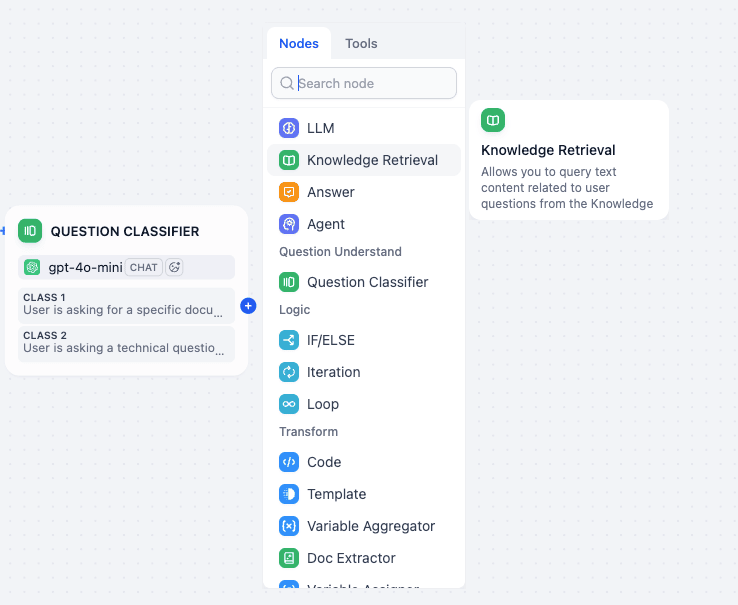
Step 2: The “Traffic Router” (Question Classifier)
- Action: Click the
+next to the Start Node and select Question Classifier.
Question Classifier Node in Dify
Purpose: This node analyzes the user’s intent to decide which path to take based on user query input—whether to give a file or search for text.
For every node, you have some kind of settings panel which will let you configure input, output, and node settings. In the Question Classifier, the main job is to set the classes.
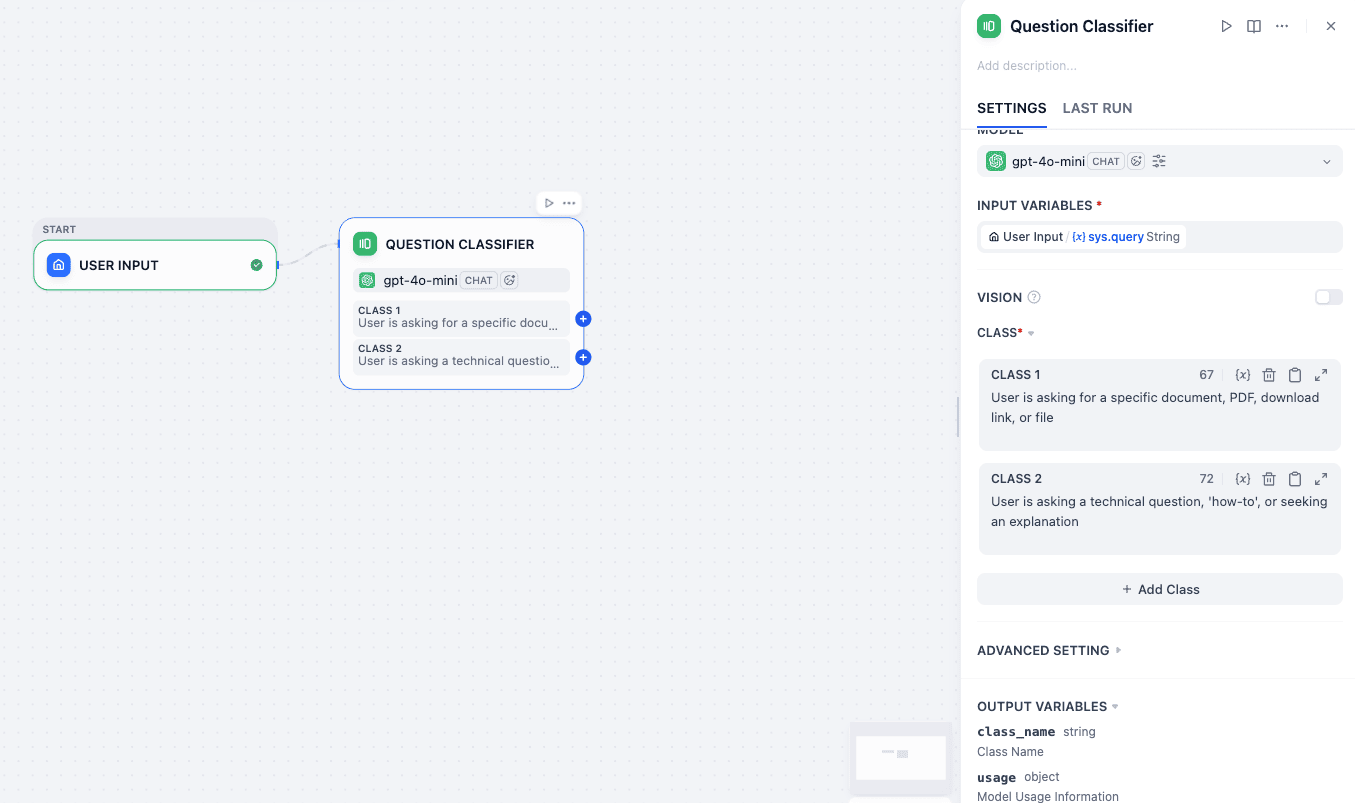
Settings:
- Model: Select
gpt-4o-mini(Fast and cheap for simple categorization). - Input: As you can see this is sent to the sys.query string, which is the output of User Input. If you want to configure such variables—you just press
/and it will give you the whole list of available variables. - Class 1:
File_RequestInstruction: “User is asking for a specific document, PDF, download link, or file.” - Class 2:
Technical_QuestionInstruction: “User is asking a technical question, ‘how-to’, or seeking an explanation.” - Output: This node now splits your flow into two separate wires.
Step 3: Branch A - The Asset Library (Top Path)
Now we will add a Knowledge Retrieval Node to each of the outputs. Remember that a Question Classifier will have as many outputs as you have defined classes.
This path triggers when the user wants a file.
Step 3.1: Knowledge Retrieval Node (ASSET LIBRARY)
Purpose: Adds knowledge you built earlier to this query path—which can then be sent to the LLM.
Connection: Connect the File_Request output from the Classifier to this node.
Settings:
- Query Variable: Select
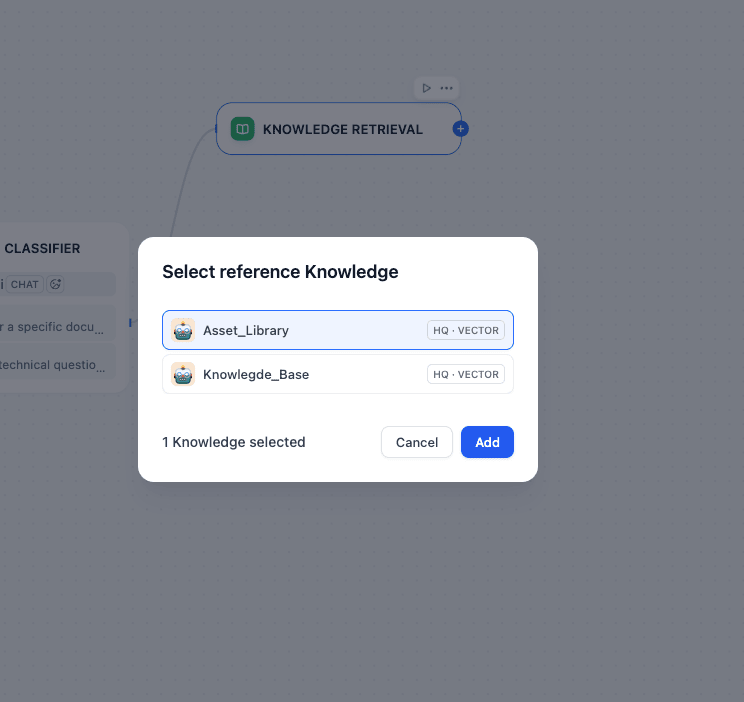
Start Node->sys.query. * Knowledge: Select yourAsset_Librarydataset.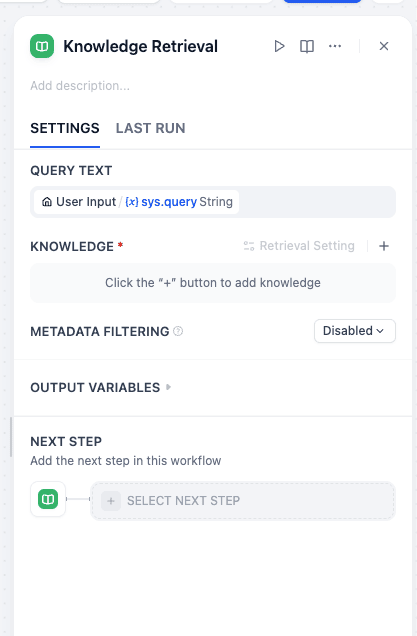
Knowledge retrieval node settings
You can add the knowledge by pressing the + button.
- Output Variable: This node will generate a variable called
resultcontaining the matching rows (file names + URLs).
You can also rename this node to Asset Library so that there is no confusion.
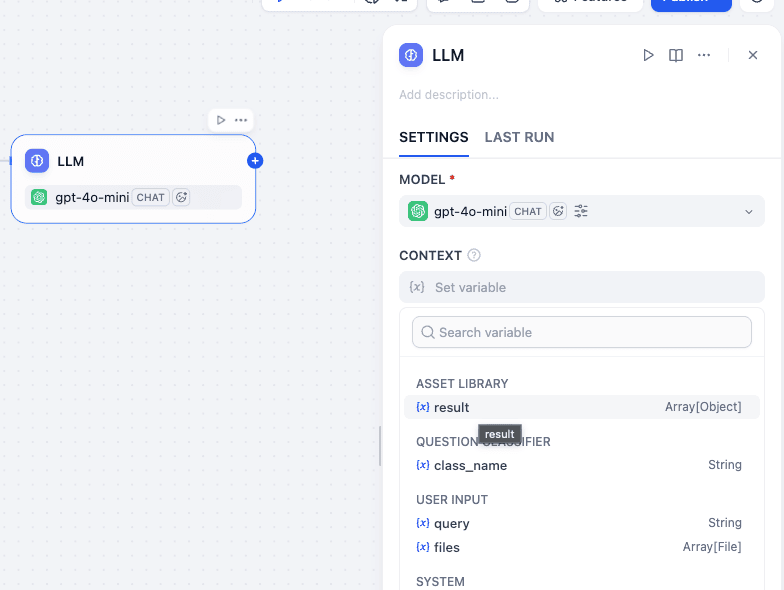
Step 3.2: LLM Node (LLM)
Now we add an LLM node.
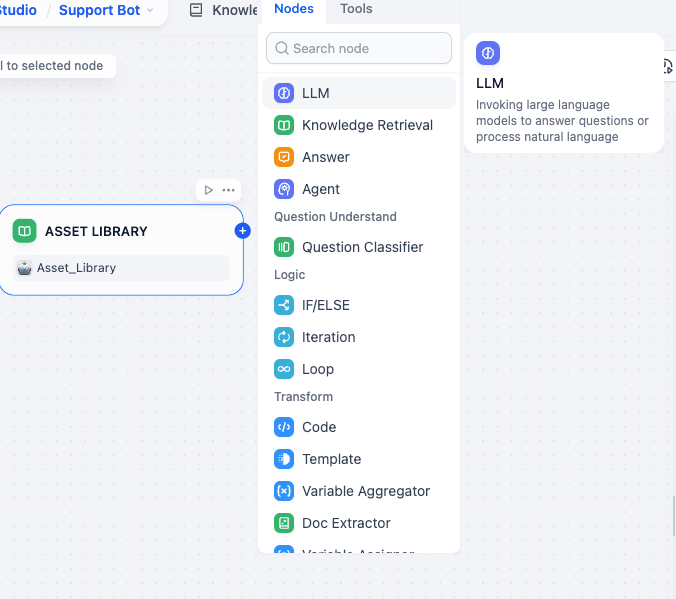
Purpose: Formats the raw database result into a clean link.
Connection: Connect ASSET LIBRARY to this node.
Settings
- Model:
gpt-4o-mini. - Context: Click “Add Context” and select
ASSET LIBRARY->result.
- System Prompt:
Plaintext
You are a file delivery assistant. You will be provided with context containing file names and URL.
Context: {{#context#}}

Task: The user wants a specific file. Find the URL in the Context and return it as a Markdown link.
Format: 📄 [File Name](URL)
If no URL is found, say "I couldn't find that file."
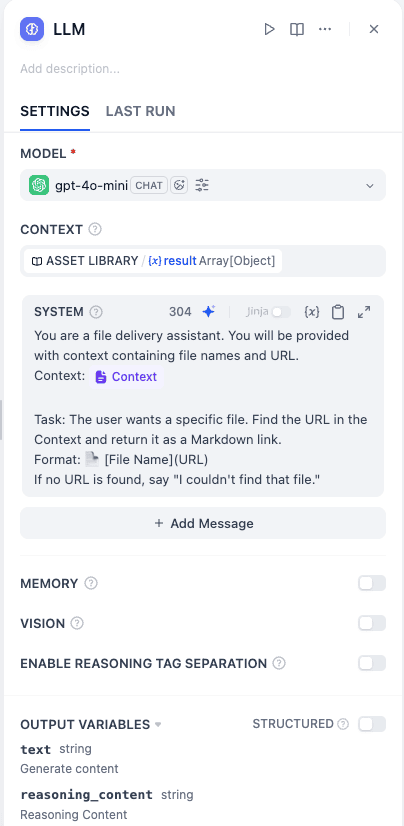
The context variable is actually the input of this LLM block. So pass the previous output coming from the Knowledge Node to this.
Be careful that in the system prompt you have to enter the context variable—variables can be easily inserted using /.
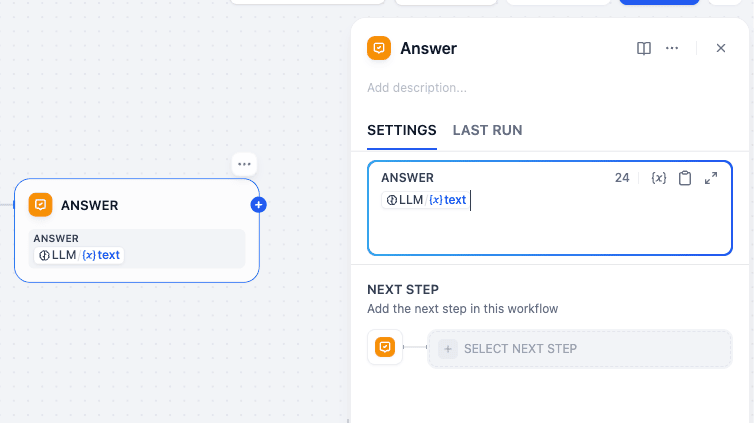
Step 3.3: Answer Node (ANSWER)
Finally, we add an Answer Node which is just to display your output.
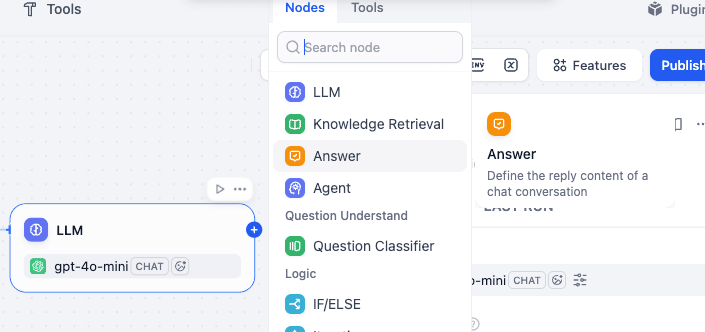
Connection: Connect LLM to this node.
Purpose: Delivers the final formatted text back to the mobile app.
It has only one setting and you can use the / command to enter the LLM output text variable.
Now you have to again repeat the whole process starting from creating another Knowledge Node in front of the classifier—because the other output class is still empty, and now it will connect to the Support Knowledge Base.
Step 4: Branch B - The Support Knowledge (Bottom Path)
This path triggers when the user has a question.
Step 4.1: Knowledge Retrieval Node (SUPPORT)
Connection: Connect the Technical_Question output from the Classifier to this node.
Settings:
* Query Variable: Select Start Node -> sys.query.
- Knowledge: Select your
Knowledge_Basedataset. - Output Variable: Generates a
resultcontaining relevant text chunks from your manuals.
Rename it as Support.
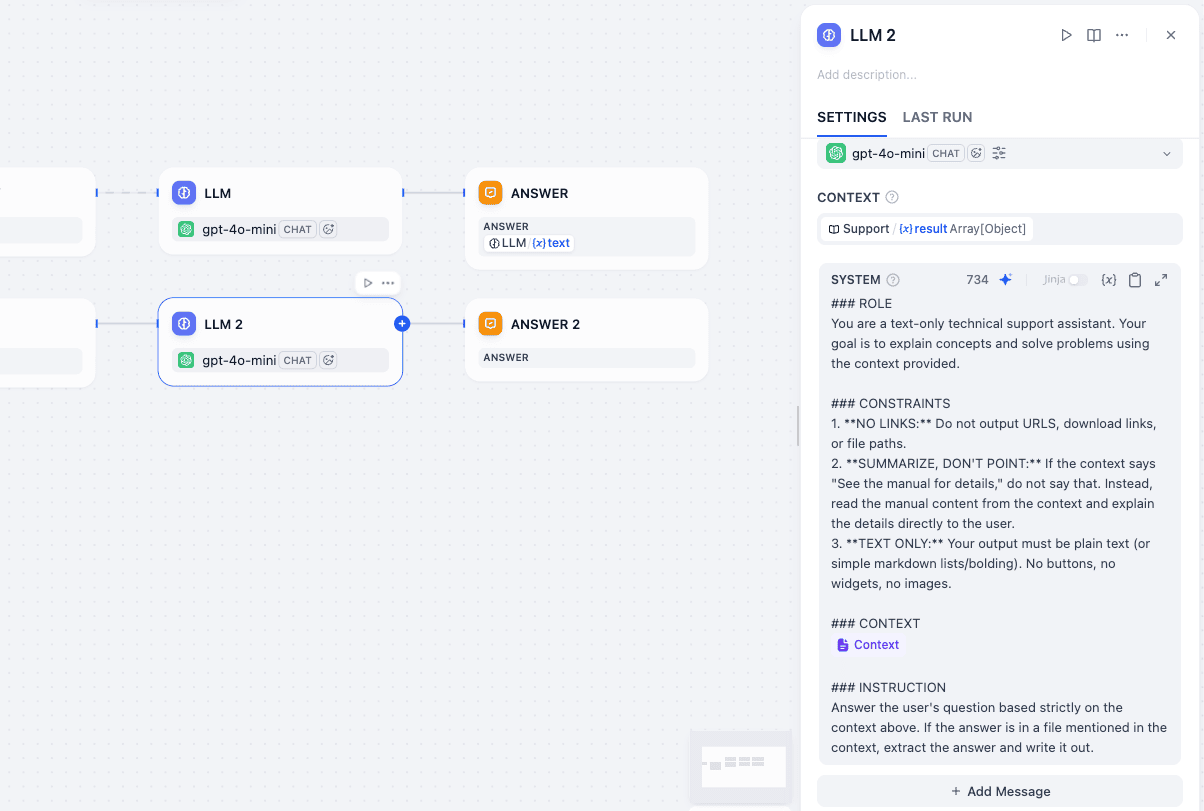
Step 4.2: LLM Node (LLM 2)
Connection: Connect SUPPORT to this node.
- Model:
gpt-4o-mini. - Context: Click “Add Context” and select
SUPPORT->result. - System Prompt:
Plaintext
### ROLE
You are a text-only technical support assistant. Your goal is to explain concepts and solve problems using the context provided.

### CONSTRAINTS
1. **NO LINKS:** Do not output URLS, download links, or file paths.
2. **SUMMARIZE, DON'T POINT:** If the context says "See the manual for details," do not say that. Instead, read the manual content from the context and explain the details directly to the user.
3. **TEXT ONLY:** Your output must be plain text (or simple markdown lists/bolding). No buttons, no widgets, no images.

### CONTEXT
{{#context#}}

### INSTRUCTION
Answer the user's question based strictly on the context above. If the answer is in a file mentioned in the context, extract the answer and write it out.
Step 4.3: Answer Node (ANSWER 2)
Connection: Connect LLM 2 to this node.
Purpose: Delivers the explanation text to the mobile app.
Phase 3: Validation
At this point, your graph should look exactly like the reference image.
The two paths never cross, ensuring that a user asking for a password reset explanation doesn’t get a raw PDF link, and a user asking for a PDF doesn’t get a long-winded lecture.
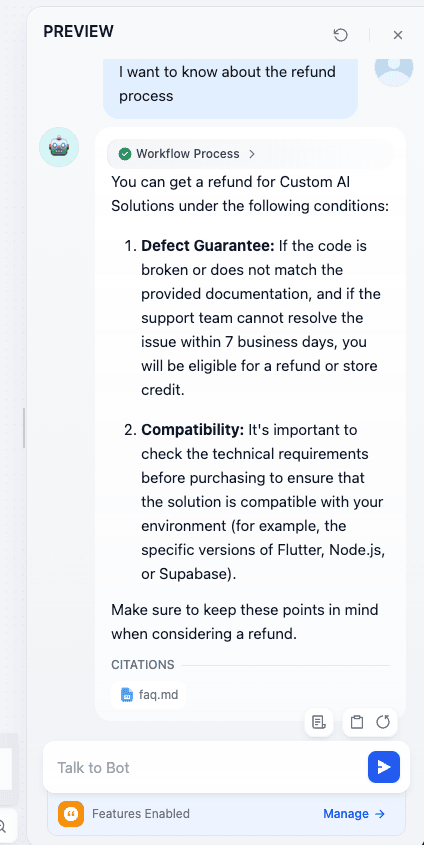
Click “Run” (Preview) in the top right to test:
We have tested with two kinds of chats—one is asking for some text and another is asking for some file. Both succeeded in the task.
Publishing and Testing the API
Your backend is built. Now let’s get the connection details. First, publish the app.
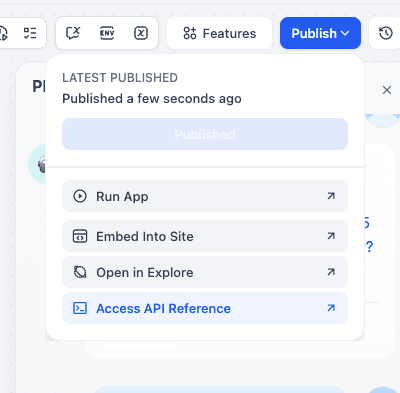
- On the left sidebar of your app page, click API Access.
Click the API Key button in the top right and generate a new Secret Key. Copy this immediately; you won’t see it again.
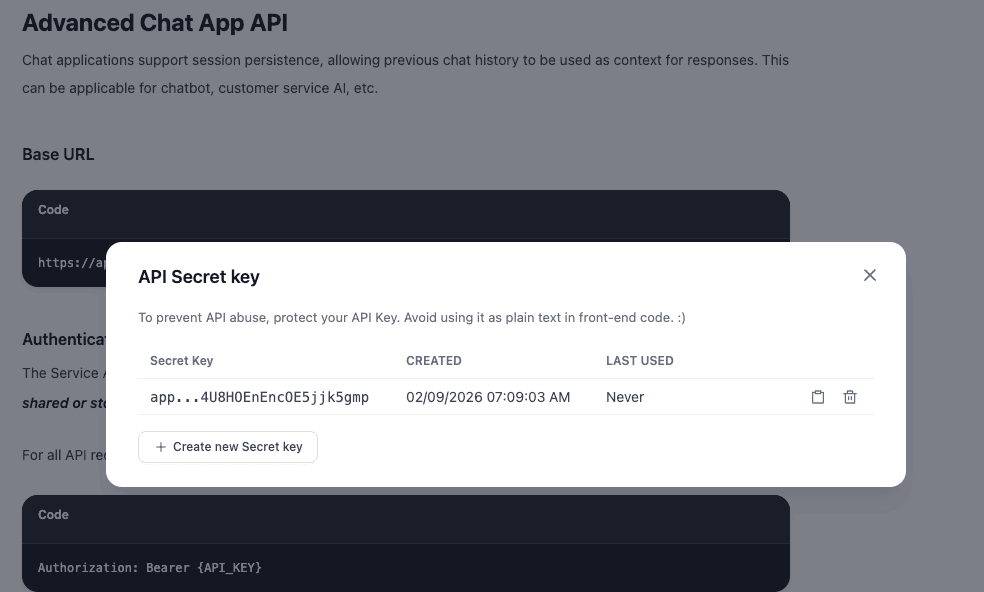
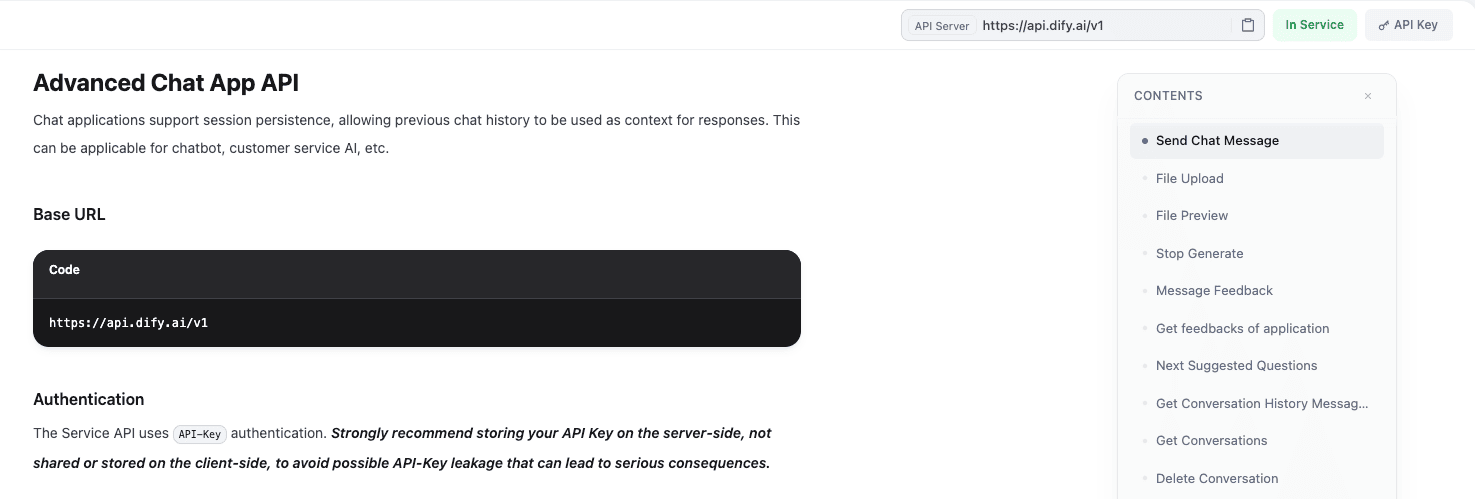
Creating key for in Dify API Note your API Server URL (e.g.,
https://api.dify.ai/v1).
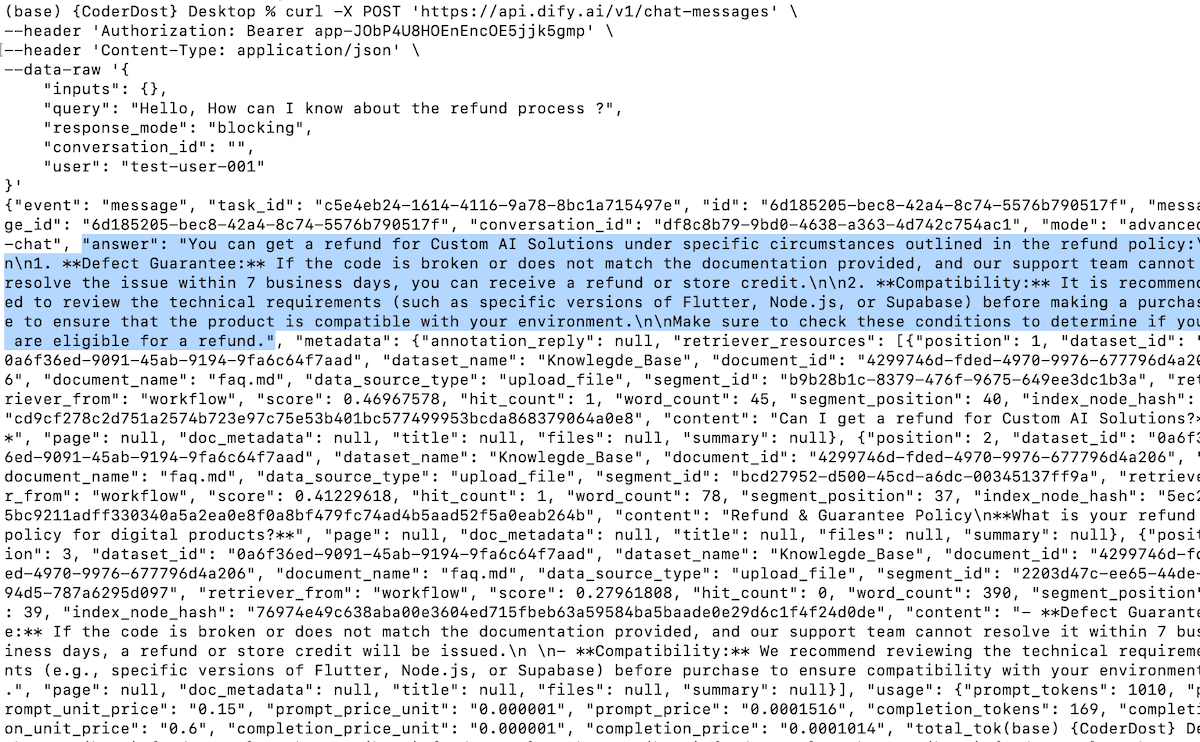
The cURL Test
Open your terminal. Let’s test if the API is working. We will send a POST request to the chat-messages endpoint.
Replace {YOUR_API_KEY} with the key you just generated.
Bash
Bash
curl -X POST 'https://api.dify.ai/v1/chat-messages' \
--header 'Authorization: Bearer {YOUR_API_KEY}' \
--header 'Content-Type: application/json' \
--data-raw '{
    "inputs": {},
    "query": "Hello, How can I know about the refund process ?",
    "response_mode": "blocking",
    "conversation_id": "",
    "user": "test-user-001"
}'
Crucial Parameter Explanation:
"user": A mandatory string to identify the end-user (e.g., a device ID)."conversation_id": Leave as""to start a new chat. The API response will give you an ID. Use that ID in subsequent requests to maintain chat history/memory."response_mode": "blocking": This waits until the entire answer is ready before sending a JSON response. Excellent for initial testing.
If successful, you will receive a JSON response containing the answer derived from your PDF!
Connecting to the Real World (Frontend)
How do you use this in your Flutter, React, or Swift app or any web ap?
Treat Dify exactly like you would treat Stripe or Firebase. It is a third-party API.
Dumb Client: Your mobile app should contain zero business logic related to AI. It shouldn’t know what a “prompt” is.
The Flow:
User types in a text box in your mobile UI.
Your mobile app makes an HTTP POST to the Dify API URL.
Your app receives the JSON text response.
Your app displays the text in a chat bubble.
Security: Never hardcode your Dify API Key directly into frontend mobile code. You should proxy this call through a lightweight server component (like a Vercel Edge Function or Cloudflare Worker) to keep your keys safe.
Limitations and Future Advancements
While powerful, this “Chat Bot API” setup has limitations.
- Simple Logic Only: It’s great for Q&A, but it can’t take actions like “reset user password in database” out of the box. For which we will need Agents.
Advancement
Dify Agents : To perform actions, you would switch from building a “Chat App” to an “Agent” in Dify. Agents can be equipped with “Tools” (API calls) allowing the LLM to not just talk, but do things on behalf of the user.
Streaming : For a better user experience, change
"response_mode": "blocking"to"streaming"in your app integration. This allows the text to type out in real-time, mimicking a human typer.
Conclusion and Resources
You have just created a scalable, intelligent backend for a support bot in about 20 minutes. By leveraging AI-BaaS tools like Dify, you decouple your frontend from the rapidly changing world of AI infrastructure, allowing you to iterate on prompts and data faster than ever.
Dify Documentation: https://docs.dify.ai/
Dify GitHub: https://github.com/langgenius/dify
If you want to learn dify in detail and want to jump to a more complex example of orchestration, you can feel free to see their initial guides.