How to integrate Firebase in React Native apps

How to integrate Firebase in React Native apps
If you would like access to the entire source code, you can check out the GitHub repo here. For step-by-step tutorial, continue reading below.
Firebase is a Backend as a Service (BaaS) that provides an advantage to mobile developers who use React Native for developing mobile applications. Firebase is a platform that got acquired by Google and has a healthy and active community.
**React Native **has been gaining popularity in the last few years, and rightfully so. Making apps in React Native is a breeze compared to Native languages (Java / Swift). React Native domain encompasses a huge variety of mobile app features which can create almost 90% of the apps today.
Features of Firebase
- Cloud Database Store
- Authentication
- Hosting
- Storage
- Machine Learning Kit
- Crashlytics
- Performance
- Test lab
- Dynamic Links
- Cloud Messaging
- In-App messaging and many more…
Getting Started
To get started, you will need a target mobile OS, whether you choose to go with iOS or Android or both. Please refer to React Native Official Documentation if you are setting up React Native development environment for the first time.
For Android
You will need SDK tools andAndroid Studio especially to setup a developer environment.
For iOS
You only need Xcode installed on your macOS.
Other Setup
- Nodejs (
>= 8.x.x) - npm/yarn installed
- react-native-cli (
>= 2.0.1)
Once those tools have been installed, run the following commands:
npm install -g react-native-cli
Now, let’s create a new React Native project, e.g. firebaseStarter
react-native init firebaseStarter
When the above command is done, open the main folder in your preferred editor. When we open the project in a code editor, its structure looks like this.

Folder Structure
To check if everything is working correctly and that our React Native app has been properly initialized, run the following command:
For macOS
react-native run-ios
For Windows
react-native run-android
Above command will run the default screen as shown below in an iOS simulator or Android emulator
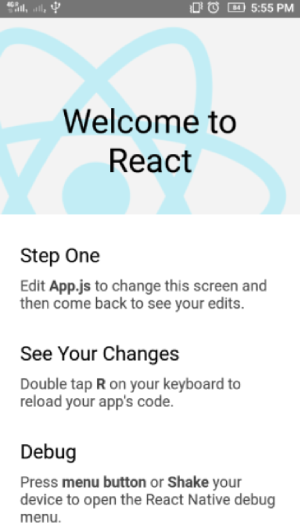
React Native comes with hot-reloading , which means you can make an edit to the code, App.js, and then hit Cmd+R and see your changes instantly update.
Firebase Setup
To add Firebase to our React Native Project, we need to run the following command at the root of the project
npm install firebase --save


**or**


yarn add firebase
Firebase Configuration
Once you’ve installed the firebase then we will build communication between our React Native app and Firebase
Step 1:-
In this step, we will create a project in a firebase console. For that, we will go to Firebase

Step 2:-
We will create a new project in our Firebase console. So click on the console button to check all of your projects.

Go to Firebase Console
Step 3:-
Create a new project if you do not have already otherwise click on any existing project you want to use.

Step 4:-
When you click on Add Project Button it will ask you for your project name, fill your project name in project name input box, accept their terms and condition and click on Create Project button.
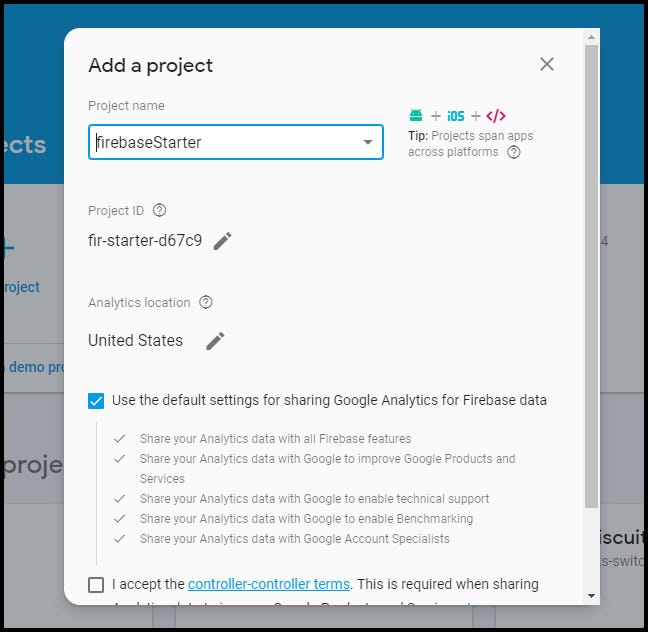
Add a project in Firebase
Step 5:-
So now our Firebase project is created. In this step, we will add Firebase to our React Native app. For this, select Add Firebase to your Web App.
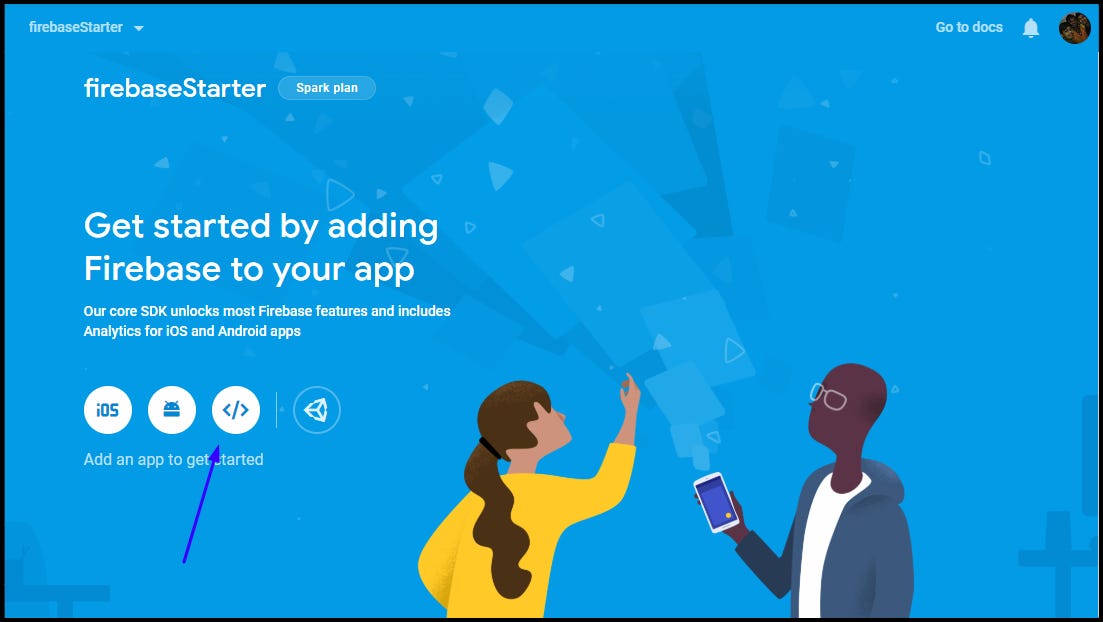
Firebase project dashboard
Step 6:-
In this Step, we will Register our web app to firebase so we will enter our App nickname and click on the register button.

Create a Firebase Web App
Step 7:-
Copy your Firebase Config from Firebase dashboard and paste in into our app code.
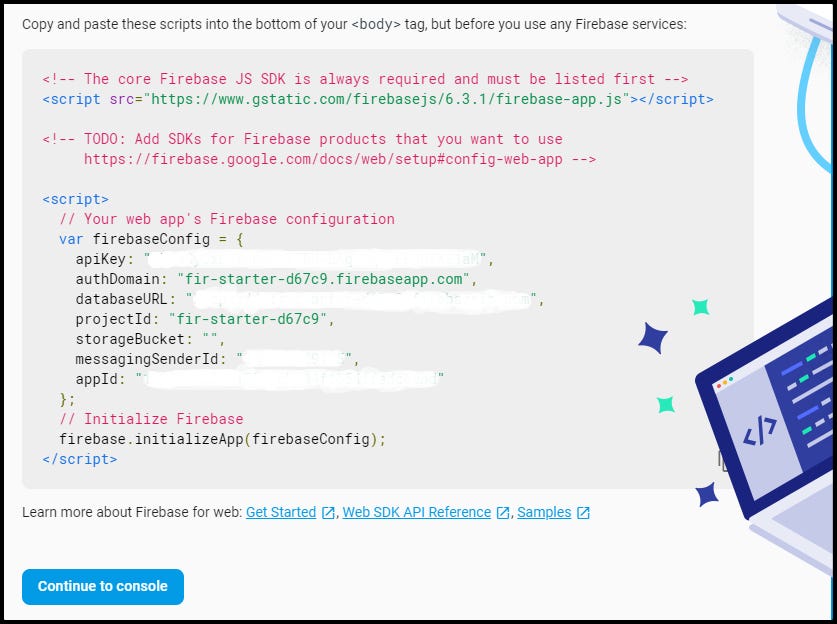
Pick Firebase credentials from the code snippet
Step 8:-
We have successfully created our Firebase app. From left side tabs, we can use Firebase tools according to our requirements.

Step 9:-
Create an environment directory inside the root folder We will then add the firebase configuration in a new file inside environment/config.js .
Open config.js and add the following line to the top:
import * as firebase from 'firebase';
Step 10:-
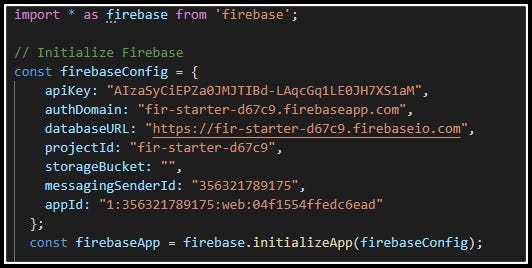
Then right above the component, initialize Firebase with your config values:
// Initialize Firebase
const firebaseConfig = {
apiKey: "<your-api-key>",
authDomain: "<your-auth-domain>",
databaseURL: "<your-database-url>",
storageBucket: "<your-storage-bucket>",,
};
const firebaseApp = firebase.initializeApp(firebaseConfig);
Your config.js should look like this:
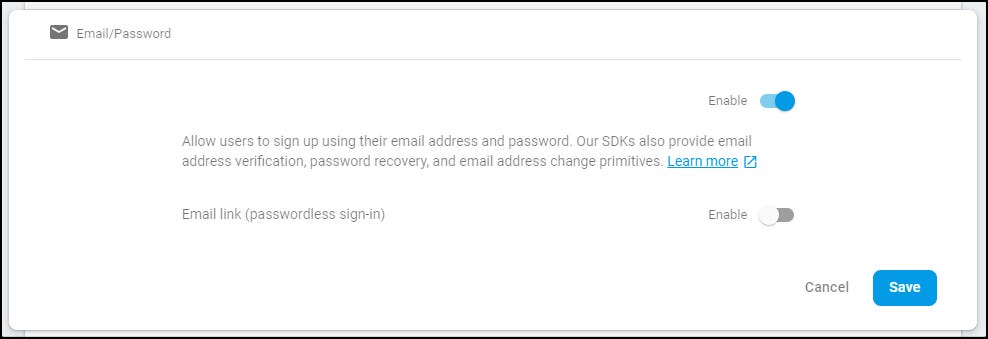
Firebase Authentication Configuration
Enable Email & Password Authentication in Firebase:
To allow users to use an email and password combo, we need to enable this provider in our firebase console.
To enable Email & Password, head on over to your Firebase Project -> Authentication -> Sign-in Method. Click on Email/Password and set to enabled and save. Your dashboard should look like this:
We need to make some modifications before we can really start building our app. Create an src directory inside the root folder. within the src directory, we will create three folders: screens components and images.
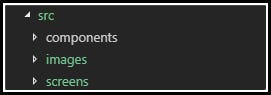
Src folder Structure
The screen directory will contain all the UI related components that we need to display to the end user.
The components folder will contain any other component that will be used or re-used to display the user interface.
The images folder will contain images that will be used in our screens.
Creating our Screens
we have to create four screens: Loading, SignUp, Login, and Main
- A
Loadingscreen that displays until we determine the auth state of a user. - A
SignUpscreen where the user can create an account. - A
Loginscreen where an existing user can login. - A
Mainscreen of our application that we only show to an authenticated user.
To navigate between different screens, we need to add the react-navigationlibrary.
npm install react-navigation --save


**or**


yarn add react-navigation
Next, we will install react-native-gesture-handler. If you’re using Expo, you don’t need to do anything here.
yarn add react-native-gesture-handler
The next step is clearly to run the command below and link the libraries we just installed:
react-native link
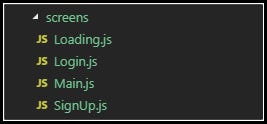
Let’s create our screens:
Create the screens inside the src -> screens
Your Screens Structure should look like this:
Screen folder structure
Loading.js
SignUp.js
Login.js
Main.js
Now that we have all our screens created, let’s wire up our navigation inside our App.js file.
If you start our app, you should see our Loading screen with the ActivityIndicator spinning forever. This is what we expected because we need to determine if the user is authenticated or not to determine where to route them.
If the user is authenticated, route them to the Main screen. Otherwise, redirect them to the SignUp screen.
Adding Firebase Authentication:
We will then add the firebase Authentication configuration in a file inside environment/config.js.
Open config.js and add the following line to the bottom:
export const firebaseAuth = firebaseApp.auth();
Determining if a user is authenticated
We can use Firebase to determine the authentication state of a user. Let’s add a check on our Loading screen that determines if a user is logged in or not.
Loading.js
We are using Firebase’s onAuthStateChanged listener to get the current auth state of the user. If they are authenticated, we route them to the Mainscreen. Otherwise, we send them to the SignUp screen.
Signing a user
We need to create a new user, so we can log in them! Let’s head on over to the SignUp screen and call our handleSignUp method.
SignUp.js
Logging an existing user
If a user already exists, so we can log them in. Let’s head on over to the Login screen and call our handleLogin method.
Login.js
Displaying the current user on the Main screen
With our current implementation, we will only see the Main screen if a user is logged in. We need to grab the currentUser from firebase so that we can display their email. Let’s update our Main screen do handle this.
Main.js
Now, when we see the Main screen, we should see the user’s email address. If we refresh the app, we should be automatically routed to the Main screen because are already authenticated.
Conclusion
In this post, we’ve shown you how to integrate Firebase and simple firebase authentication flow set up with a React Native app. You can find the complete code inside this Github repo here.