Firebase cloud functions in Ionic 5— Complete guide

This post will take you through the basics of Firebase cloud functions — How to create, deploy, and use a cloud function.
We will also have a look into the cloud function dashboard in Firebase to understand the capabilities. We will ALSO check out avery useful tool for Firebase — Firebase emulator, which allows you to run a Firebase project fully on localhost, including UI ! 😲 😲
We will explore two ways of running Firebase locally
- Using Firebase serve — Old way (deprecated)
- Using Firebase Emulator — Latest feature, includes UI as well
What is Firebase ?
If you don’t know much about Firebase … you need to catch up with the latest tech news. Firebase is the hot stuff in the market for last 5 years to create quick mobile app back-ends, with a ton of built-in and ready-to-integrate features.
The most used feature of Firebase is as a back-end. It does not require any back-end setup or configuration from developer’s end. Along with this back-end, you get a ready-to-use database as well. Some of the other popular features are
- Push notifications
- Cloud functions
- Analytics
- Ad-mob
- Crashlytics
- In-app messages
- Remote config
- Social logins
- …… and more
That being said, I’m sure you are very much interested in learning all of it. You can check out our Firebase blogs on our site, along with free starters ( 👻 woohoo ! )
What are (Firebase) Cloud Functions?
When you use a ready-to-integrate back-end (BaaS) in your mobile or web-app, you are basically not setting up any back-end on your own. So essentially all the functions / services are written beforehand for you. These functions and services are created based on the most used features by users. e.g.
- Authentications
- Database operations — Read, Write, Update, Delete
- In some cases — Filtering, pagination, geo-queries etc.
But what if you want a custom function or query for your app ? Because you didn’t create the back-end, you cannot write a custom function, right ? Not really 😏. Cloud functions come to your rescue. These are basically simple functions you can write and deploy on the BaaS platform, and these functions will be executed as if they are a part of the platform. (of course, you need to take care of the syntax, requests, responses etc. )
For example, you are a Grocery shopping app. With a BaaS like Firebase, you can Read, Write, Update and Delete the data. But let’s say for a certain feature, you need to show the user their monthly expense on the app. Now, Firebase does give you options to query the data by fields like Date etc. But combining data from different tables can be tricky with single or even a complex query. In such a case, you write a function which queries all relevant tables, prepare the data as you want, and sends back to your app in smallest possible data format. That is where you’ll use Cloud Function.
Overall, you can divide the Firebase cloud functions advantages as follows
- You can create custom functions to do complex queries e.g. queries combining multiple tables, date and geolocation calculations
- Calling a cloud function is as easy as calling a REST API
- Complex calculations in the back-end are faster than on front-end e.g. finding matches in a dating app
- Cron-jobs can directly run cloud functions on a scheduled basis, doing regular calculations for the database
- Creating, updating and deploying Firebase cloud functions is as easy as changing code in your IDE and committing code to Git.
- Get rid of managing servers — Firebase takes care of everything
- You can test the cloud function on local environment as well
But why test locally ?
Firebase has been around for more than 5 years, and is extremely popular among developers. Firebase has now started charging developers for different features at different rates. It is still very economical, but the charges are levied per API call, or per computation etc. So it is always better to test all your API calls (which can run into thousands), cloud functions on local system and deploy to real Firebase server only when you are confident.
What is Ionic 5?
You probably already know about Ionic, but I’m putting it here just for the sake of beginners. Ionic is a complete open-source SDK for hybrid mobile app development. Ionic provides tools and services for developing hybrid mobile apps using Web technologies like CSS, HTML5, and Sass. Apps can be built with these Web technologies and then distributed through native app stores to be installed on devices.
In other words — If you create native apps in Android, you code in Java. If you create native apps in iOS, you code in Obj-C or Swift. Both of these are powerful, but complex languages. With Cordova (and Ionic) you can write a single piece of code for your app that can run on both iOS and Android (and windows!), that too with the simplicity of HTML, CSS, and JS.
Ionic has been my (our) favorite front-end tech for more than 5 years. It is amazingly flexible, simple and powerful. You can use all the Firebase functionalities with other techs like React Native, native iOS or android as well, but for ease of demo, I’ll use Ionic.
Post Structure
We will go step-by-step to understand the basics of integrating Firebase cloud functions in an Ionic 5 app, and testing the same. We’ll follow these steps
- Create a basic Ionic 5 app
- Create a Firebase project (Real)
- Setup Firebase functions and write your first function
- Test the Firebase function locally — Two methods
- Deploy Firebase function to server and test from your app
- Firebase cloud function dashboard and capabilities
- Write a complex cloud function and fetch result in the app
Let’s jump right in
1. Create a basic Ionic 5 app
I have covered this topic in detail in this blog.
Creating an Ionic 5 app is as simple as running a single command from command prompt / terminal.
In short, the steps you need to take here are
- Make sure you have node installed in the system (LTS V14.x at the time of this blog post)
- Install ionic cli using npm
- Create an Ionic app using
ionic start
You can create a sidemenu starter for the sake of this tutorial. On running ionic start , node modules will be installed. Once the installation is done, run your app on browser using
$ ionic serve
At this moment, your app should look like this

2. Create a Firebase project and connect to your app
I have covered Ionic 5 Firebase integration in detail in this blog
Note — Firebase functions can run without attaching Firebase in the app (as REST APIs). You need to copy the Firebase configuration and install angularfire plugin only if you want to attach Firebase database or other functionalities in your app.
Creating Firebase project
Go to console.firebase.google.com and create a new project. Your dashboard will look like this when you have a number of firebase projects

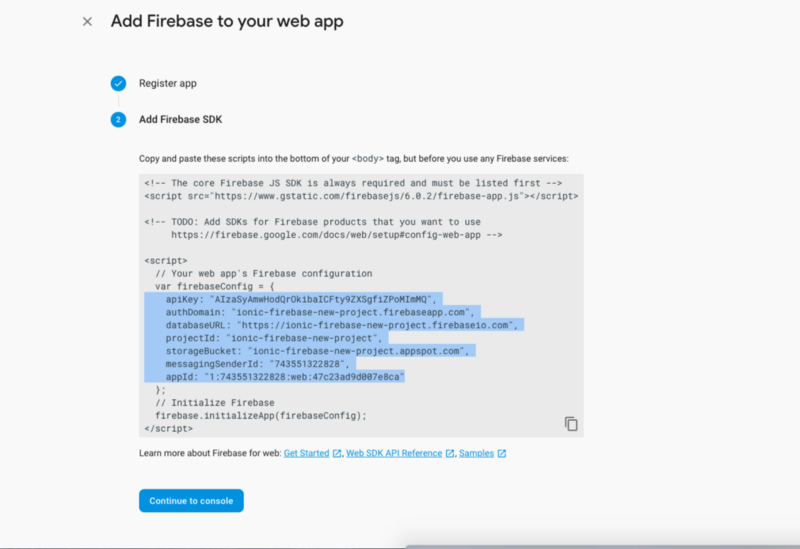
Copy Firebase configuration
Open your project by clicking it, and in the dashboard, select “Add Firebase to your web app”. Follow the procedure and you will get your project’s configuration. Copy the configuration, this will be used to connect your app with Firebase.
Integrate Firebase in your Ionic app
(Required only if you want to attach Firebase database or other functionalities in your app)
Back in your Ionic app, install Angularfire plugin. AngularFire is The official library for Firebase and Angular.
To install the plugin, run the following command from your terminal
$ npm install firebase @angular/fire
Paste your Firebase config in environment file of your Ionic app project. The environment file should be in the project root.
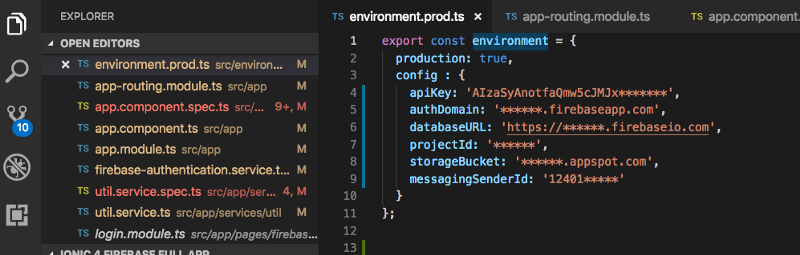
After this, you will need to import angularFire and firebase in your app.module.ts and then you can implement CRUD and other functionalities in the app.
3. Setup Firebase functions and write your first function
Firebase functions can be used once we setup firebase-tools in the system. Install it globally with npm using
$ npm install -g firebase-tools@latest
Login to Firebase
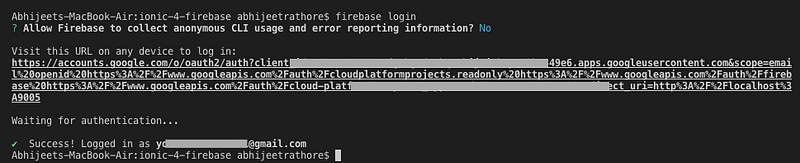
Before using Firebase functions, you need to login to your Firebase account using CLI (yeah ! 🤷♂). Run
$ firebase login
and it will open the Google login card in your browser. Login to your account and the CLI will receive the authentication info (pretty cool, right ? )

Your CLI will look like this
Connect Firebase to your project
Once you are logged in, you need to define which Firebase project you want to connect to your Ionic 5 app (because you can have more than one in your Firebase console. I have 30+projects 😃 ! ). Run
$ firebase init
This will first ask you to choose the project, then choose functions option from the choices. Follow the instructions and setup all dependencies of Firebase functions
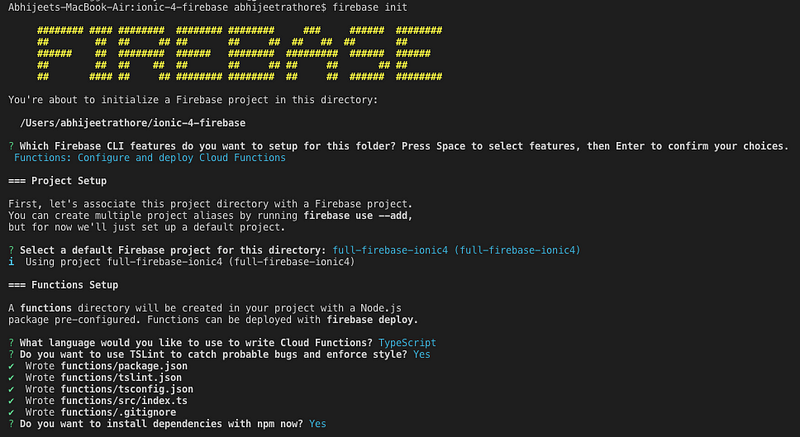
Note — Sometimes linting creates errors during deployment. If you face this issue, try re-running firebase init and don’t select linting option when askedOnce you have Firebase project connected, you will see a functions folder in your project root, as shown below
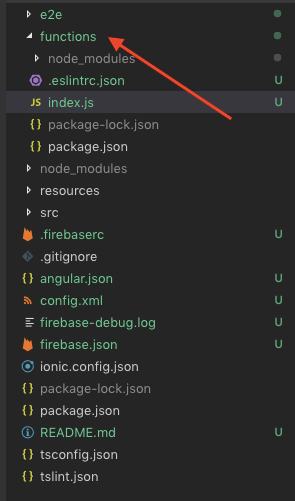
Create a firebase function to say “Hello World”
Open functions/src/index.ts (or .js, depending on what you chose in previous step). This is the file that will contain functions to be executed by Firebase. Firebase creates a URL for each of these functions when deployed, so you can call these functions like a REST API
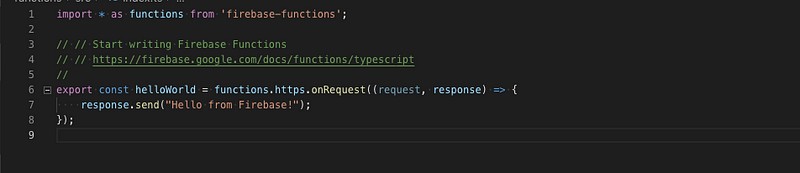
By default, Firebase gives you a helloWorld function, uncomment it and you can use it as is. Let’s understand what is happening here (if you haven’t used node.js ever)
- export exports the function as an individual entity. You can have as many functions as you want in this file itself
- request is the request you send from front-end, similar to a REST API. It is relevant for POST requests
- response is the response Firebase cloud function will send back to your app
In this sample case, the function is simple sending back a “hello from Firebase” (irrespective of request i.e. this is a GET type request). Change the response as you like !
Congratulations, you just wrote your first Firebase cloud function.
⭐️️⭐️️️ Extra : Adding CORS to Firebase function to run locally⭐️️⭐️️️
When developing an Ionic 5 app, you’ll do most of your development in browser. So it makes sense to get the Firebase function response in serve as well. By default, Firebase does not allow response to localhost urls. To avoid this, we will have to add CORS middleware in the Firebase function. If you want to test simply in your phone, CORS middleware is not required.
Don’t worry, it is very simple.
- Add CORS dependency in your
functions/package.json
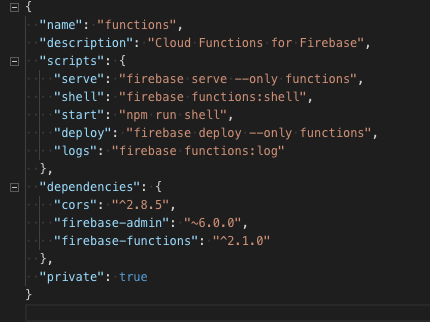
2. Move in functions folder, and run npm install again to install the new dependency
3. Import CORS in Firebase functions file, and modify the response code as follows
Now, you can run the Firebase function in your ionic serve as well !
4. Test Firebase functions locally
As I mentioned earlier, you can test Firebase functions locally. Once you have setup firebase init you can run the Firebase server locally either by
- Firebase serve
- Firebase Emulator
Method 2 is actually a superset of Method 1. Method 1 has been deprecated (or not recommended) by Firebase now. When you run Firebase emulator, essentially you are running firebase serve internally, AND also getting to see all responses and updates on the emulator UI.
Firebase Serve Method
To set this up alone, during firebase init , select functions option

Once init is completed, run the Firebase server locally using
$ firebase serve
The terminal will show up the information.

When you run the local Firebase function URL http://localhost:5000/full-firebase-ionic4/us-central1/helloWorld , you’ll see the response in browser window, as well as a function call in the terminal.
Firebase Emulator Method
During firebase init choose the Emulator option. Rest of the steps are self-explanatory

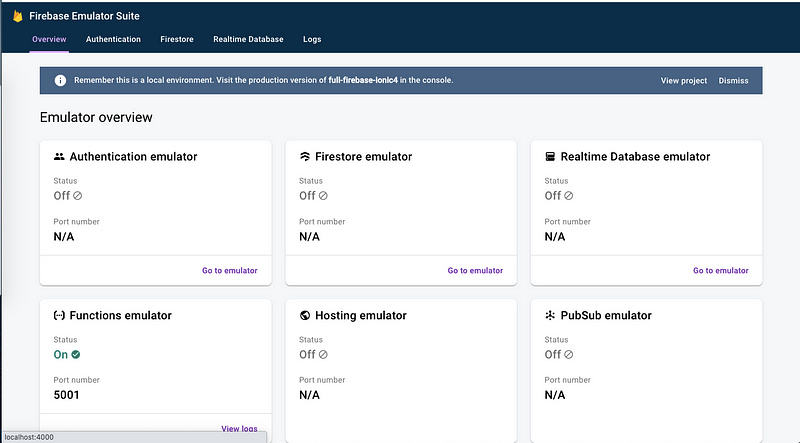
Once setup is done, run emulator using
$ firebase emulators:start This will start Firebase emulator (on the port you chose when setting up Firebase emulator). Now when you call the function URL, you will see the response in browser, as well as in the Firebase emulator logs
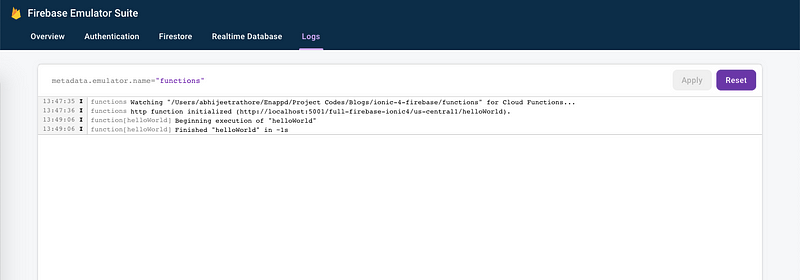
This is the power of Firebase emulator.
To read more about how to setup Firebase emulator and use different features, read my detailed blog here.
5. Deploy Firebase function and test from your app
Now that the function is ready and tested locally, we will deploy it to Firebase. This way we can use it in the app directly (similar to a REST API)
Deploy Firebase function
To deploy the firebase function, in your root folder itself, run
$ firebase deploy --only functions
This will make sure you are only deploying functions to Firebase. This is especially useful when you have multiple things attached to Firebase, and you have made changes in only one of them.
Note: When you make calls on Firebase server (not local) each call, function execution etc is counted towards your subscription. Make sure you do all testing locally, then deploy on real server
Deployment will look like this in the CLI
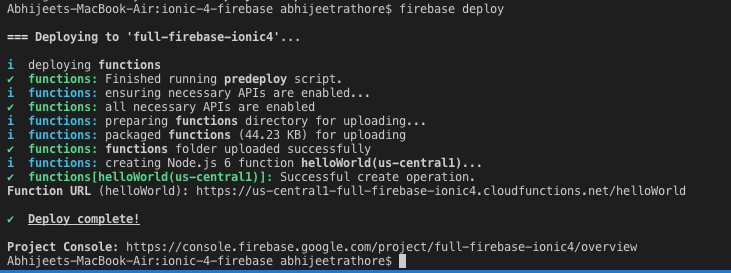
Notice in the function URL, it provides you the URL to call the cloud function. https://us-central1-full-firebase-ionic4.cloudfunctions.net/helloWorld
Calling the cloud functions from Ionic 5 app
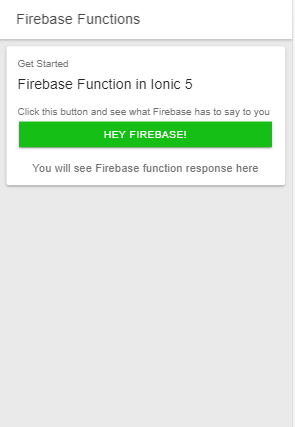
I modified the app to have a button with which we can call the cloud function. Right below the button, we will receive the response from Firebase cloud function.
To enable our app to make HTTP requests, we import HttpClient in our app.module.ts
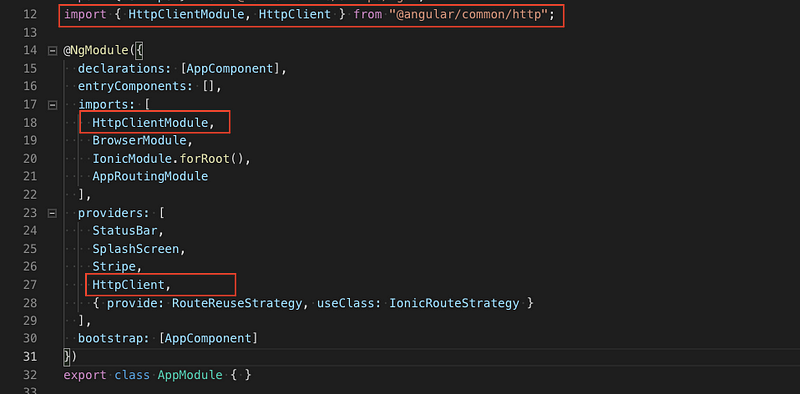
and in our home.page.ts page
import { HttpClient } from "@angular/common/http";...
constructor(private http: HttpClient){}Now, on the click of our button, we’ll call the cloud function, and receive the response. The home.page.ts looks like following
Just for reference, the home.page.html looks like following
Now, hit the button, and you’ll receive a response from Firebase function !
🎊 Voila ! Your first Firebase cloud function is working like a charm !

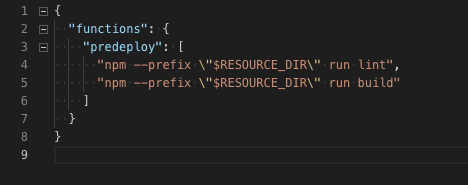
Little troubleshooting tip
If you face pre-deploy linting error during deployment, go to your firebase.json file and remove the pre-deploy script calls from JSON.
6. Firebase cloud function dashboard
It becomes challenging to maintain a large number of cloud functions, and their executions or errors with CLI alone. Firebase has provided a very good solution for this in form of the online dashboard, or the local emulator.
In Firebase console is a little more well designed than local emulator. You can actually check all the functions deployed, their executions and if they faced any errors.
List of deployed functions
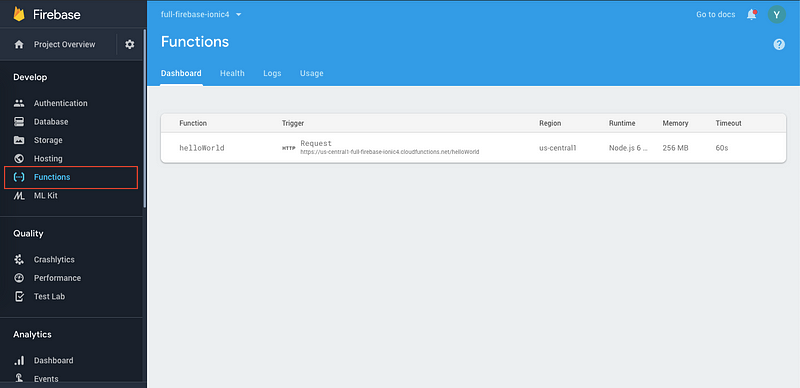
You can see the functions deployed in the Functions tab of Firebase console.
Execution log
You can also check the execution of each / all function(s) in Firebase console — Logs tab
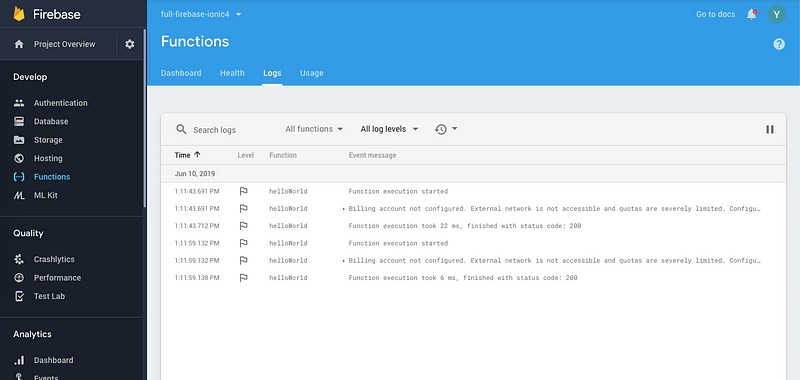
The logs show general comments of errors returned by the function. This is especially useful if you want to track any error happening in your functions.
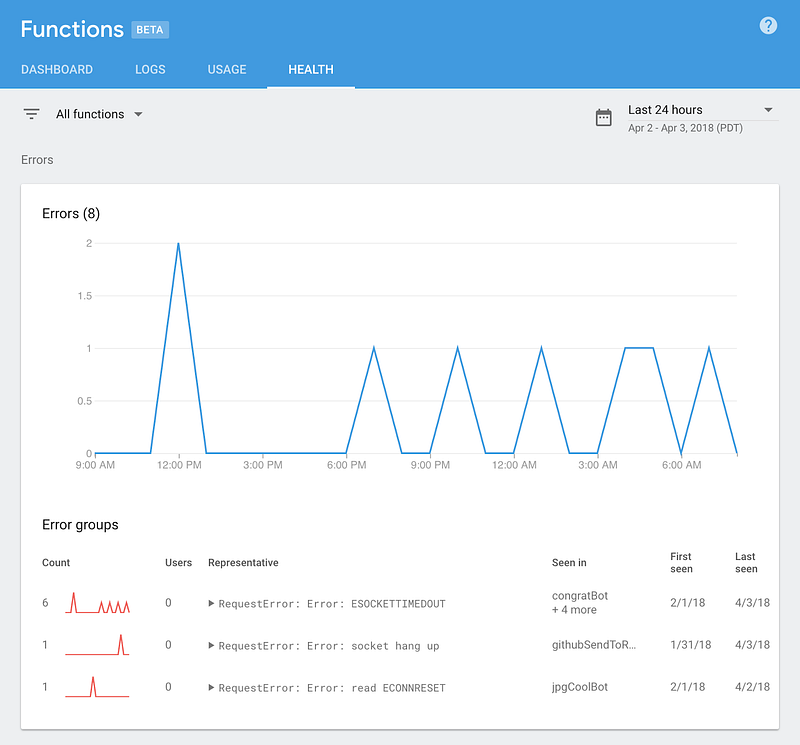
Functions’ health
If you have a large number of functions, and huge amount of executions, then a list of logs won’t suffice. You can check an overview of errors in the Health tab
Usage log
To track how many functions you execute in a time period (to check against your billing plan) you can use the Usage tab
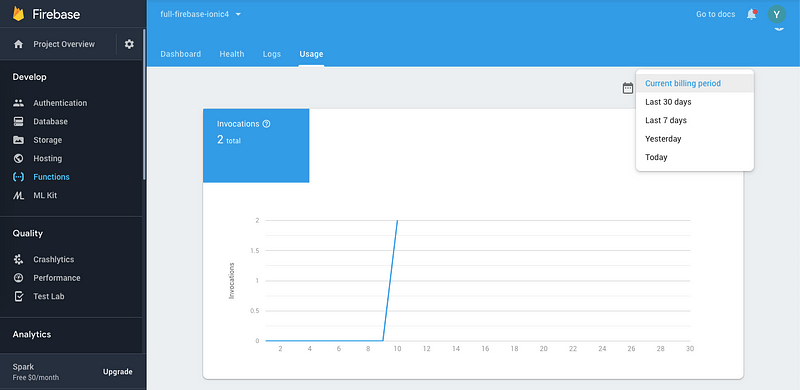
This way, Firebase provides a good number of visual and logging tools to make your life easy when dealing with cloud functions.
7. Write a cloud function with complex query
For the first example, we simply responded with a “Hello from Firebase”. But that is not sufficient for most of the apps. Apps often need to query the database in various ways, and need the final result as a response.
I am putting out a similar example here. The example is implemented with FireStore DB. This is a sample example for finding a driver in a Taxi Booking Platform. The logic isn’t as complex as that of Uber etc. but queries couple of DB tables, and then updates certain documents in the DB as well, before sending a response to the app. Let’s have a look.
Let us understand what is happening here
- As we did before, we imported certain dependencies. Additionally,
firebase-adminis also imported, which is required to allow Firebase function to access your Firebase project’s DB (yes, there is no direct connection allowed😺) - Same as before, we implemented CORS for localhost usage
- Since there is a
requestobject coming in, this is a POST request. - In the first step, the
req.bodyis read, and stored in a variable - Then,
driverscollection is read in the DB, and a driver matching the emaildriver@enappd.comis filtered. In a production app, this will be the place where the app’s “driver finding logic” will go. - Once the driver is found, the customer’s record is updated with
originanddestinationstoring customer’s coordinates. - Once the customer is updated, the driver record is also updated, marking him unavailable, and saving user_id in driver’s record
- Once all this process is done, the response is sent to the app. The response contains the information of the driver selected. This information will be used in the app to show the customer which driver is arriving for the ride.
This was a simple example of how Firebase cloud function can perform complex queries in your DB, and return the result to your app quickly. If all this was done on front-end, the response time would be much larger because of the multiple DB query hits.
Conclusion
In this post, we learnt how to create, integrate, deploy and test simple Firebase functions. We saw how to test Firebase functions locally. We also saw the Firebase console capabilities related to functions. We had a look at how complex queries can be performed with Firebase functions, citing example from a Taxi Booking Platform. Firebase functions are an amazing tool to enable your app do much more than simple DB querying, or making complex queries from front-end.
Stay tuned for more Ionic blogs !
Next Steps
If you liked this blog, you will also find the following blogs interesting and helpful. Feel free to ask any questions in the comment section
Ionic Capacitor
- Basic — Geolocation | Barcode & QR code | Facebook Login (Angular) | Facebook Login (React) | Icon and Splash | Camera & Photo Gallery
- Advanced — AdMob | Local Notifications | Google Login | Twitter Login | Games using Phaser | Play music | Push Notifications
Ionic Cordova
- Taxi Booking App example with Ionic, Node, Express and MySQL
- Ionic Payment Gateways — Stripe with Firebase | Stripe with NodeJS | PayPal | Apple Pay | RazorPay
- Ionic Charts with — Google Charts| HighCharts | d3.js | Chart.js
- Ionic Authentications — Via Email | Anonymous | Facebook | Google | Twitter
- Ionic Features — Geolocation| QR Code reader | Pedometer| Signature Pad | Background Geolocation
- Media in Ionic — Audio | Video | Image Picker | Image Cropper
- Ionic Essentials — Native Storage | Translations | RTL | Sentry Error Monitoring
- Ionic messaging — Firebase Push | Reading SMS | Local Notifications
- Ionic with Firebase — Basics | Hosting and DB | Cloud functions | Deploy App to Firebase | Firebase simulator
- Unit Testing in Ionic — Part 1 | Mocks & Spies| Async Testing
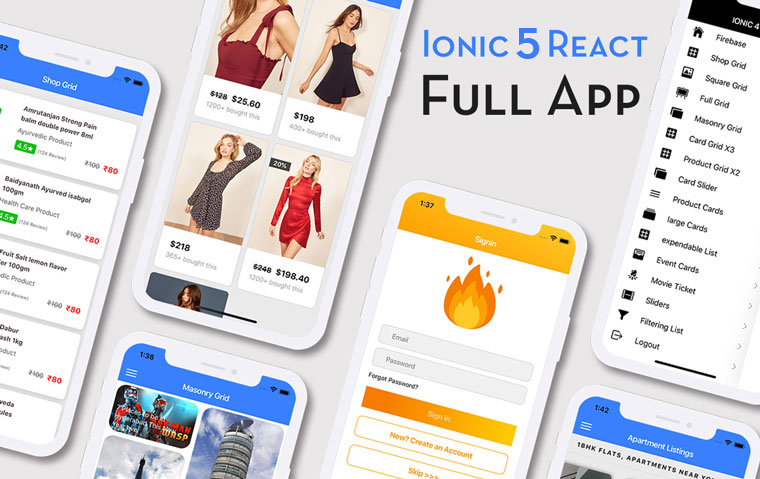
Ionic React Full App with Capacitor
If you need a base to start your next Ionic 5 React Capacitor app, you can make your next awesome app using Ionic 5 React Full App in Capacitor
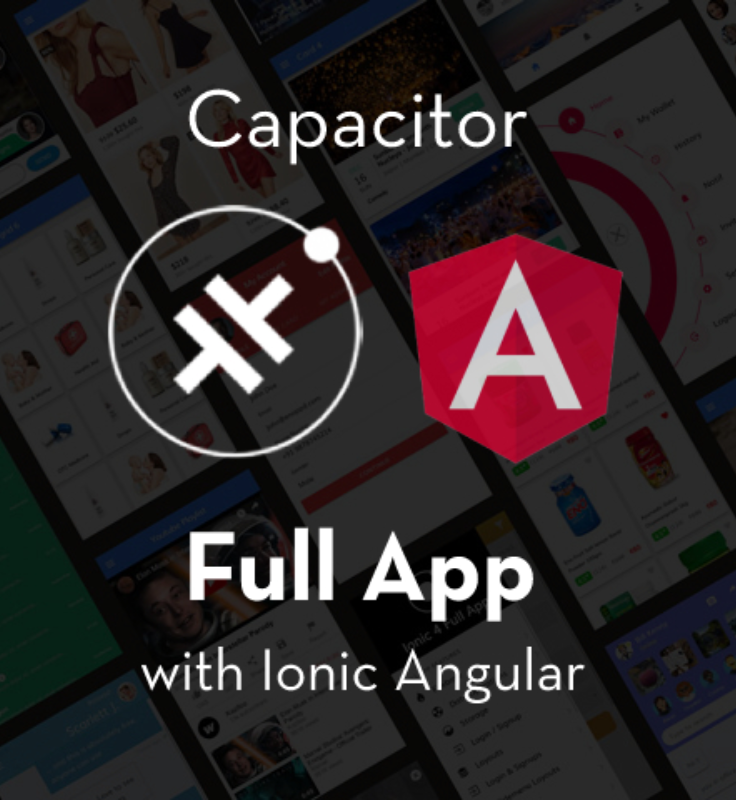
Ionic Capacitor Full App (Angular)
If you need a base to start your next Angular Capacitor app, you can make your next awesome app using Capacitor Full App
Ionic Full App (Angular and Cordova)
If you need a base to start your next Ionic 5 app, you can make your next awesome app using Ionic 5 Full App