Socket IO with Ionic 5 Angular Application

In this tutorial, we will explore and implement the socket IO library with the Ionic 5 Angular application. ngx-socket-io is one of the most used packages — we will use this package to implement the socket IO library. But before implementing, let’s explore — what sockets are? After that, we will be making a group chat application using Ionic, where anyone can join in and chat with any number of people.
What is Ionic?
Ionic is a complete open-source SDK for hybrid mobile app development created by Max Lynch, Ben Sperry, and Adam Bradley of Drifty Co. in 2013. Ionic provides tools and services for developing hybrid mobile apps using Web technologies like CSS, HTML5, and Sass. Apps can be built with these Web technologies and then distributed through native app stores to be installed on devices.
We can use Cordova or Capacitor to build these awesome apps and have native functionalities. With this, we get some amazing native plugins to use like Image cropper, Camera, and many more.
What is a Socket?
Socket programming is a way of connecting two nodes on a network to communicate with each other. One socket(node) listens on a particular Port (e.g 8080) at an IP address, while the other socket reaches out to the other to form a connection. Ports, just for understanding, can be considered virtual doors to network in/out from your computer/ or any system. Like web servers run HTTP applications on port 80 of servers (or 443 in case of HTTPS). So a browser always knows which PORT server is listening for requests. Socket Programming is dependent on the PUSH SUBSCRIBE Model.
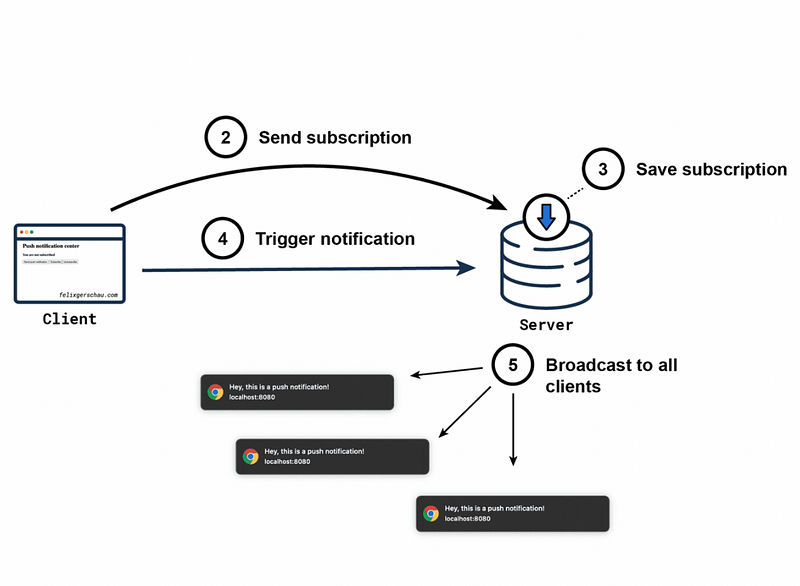
(1) The server forms the listener socket while (2) the client reaches out to the server via its own port to subscribe, (3) the Server saves such subscriptions, (4) whenever some client triggers a notification message on socket, (5) server broadcasts to all subscriber (including or excluding triggering client). Socket IO helps in making all these steps very easy for us. Socket IO deals with directly connecting to a socket (programmed object representing a port) on a different node on the network.
The advantage of Socket is that — you can directly put a listener on your system and whenever another node has a change of data — it will listen on your end almost immediately. So NO delay like we experience in sending HTTP requests and getting a response back.
We have to implement the Sockets in JavaScript (Angular). To implement it in Angular, we will use the ngx-socket-io package. There can be various applications where we can use the socket programming:-
- Messaging Application
- Location Tracking application
- Any application having a real-time exchange of data
There can be many more applications that can be based on Socket Programming. It is totally based on application implementation and its business logic (i.e. what you want to implement using that application).
About the Group Chat Application
In this tutorial, we will be implementing a simple group chat application. Anyone can enter into the chat with their name and chat with other people there. To implement this we will need the Ionic 5 application and a Node JS server. We will be covering both Application and Server Side code in detail.
Steps to be followed:-
We will be implementing the Group Chat application, simply in 4 steps:-
- Creating a new Ionic 5 Angular project.
- Installing required packages and Implementing the Chat application logic.
- Creating a new Node JS project.
- Installing required packages and Implementing the Node JS server logic.
- Knowing the Flow of the Chat Application.
So lets start and dive more into the implementation of the Awesome Group Chat application.

Step 1:- Creating a new Ionic 5 Angular project
You can create a new Ionic 5 Angular project using the below command OR use any existing application. If you want to learn more about how to create Ionic Apps — you can go through our Beginners blog.
$ ionic start chatApp blank
This will create a new blank application in your working directory with the name chatApp. More details on how to create an Ionic App is in this blog.
Step 2:- Installing required packages and Implementing the Chat application logic.
We will implement this step into 2 sub-steps:-
a) Installing and configuring the required Packages:-
Once we have created the new Project, now we will install the package that is required to implement the Socket programming. To install the ngx-socket-io, just run the below command in the project directory:-
$ npm i ngx-socket-io
This will install the package and we can start configuring the Socket with Node JS server. After installing the package, Importing [Line 7] and Injecting [Line 15] the ngx-socket module into the app.module.ts :-
In the above code, we have injected the Socket Module [Line 15] and set up the socket config with the node server, initially, we will set up the Node Server in localhost:3000 port later you can deploy that code to Heroku or any other platform. Once we have injected the Module, now we can use the Socket provider in any of the Pages.
b) Implementing the chat application logic:-
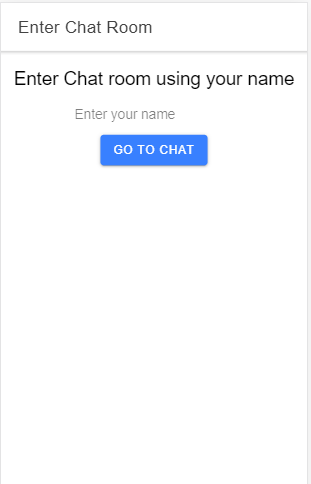
Simply we will modify the home page, where you can enter the name and continue to the chat room. So let's look at the HTML for the home page:-
In the above HTML, there is one input field (i.e. you can enter your name) [Line 17] and one button (i.e. go to the Chat Room) [Line 20]. The above HTML will look like:-
Now we will look at the logic of the home page defined in home.page.ts file.
The above TS file contains simple logic, which simply redirects to the chat page if you enter the valid name. Now we will look at the chat page in which we communicate with others using sockets.
We will first generate the new chat page, which will contain the chat room in which people chat with each other using text messages. You can generate the page using the below command:-
$ ionic generate page chat
Now we look at chat page HTML code, we have designed a simple chat UI that shows the sender name, message content, and time. Below is the code for chat.page.html file :-
CSS file related with the above HTML file is defined below:-
The Chat Page will look like the below screen:-
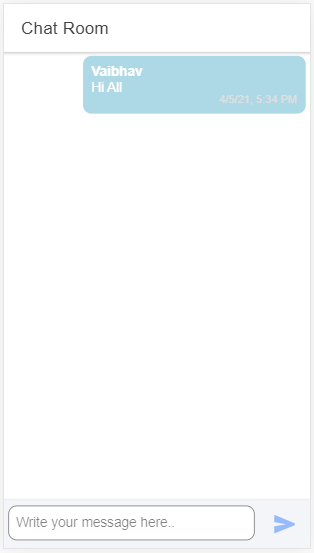
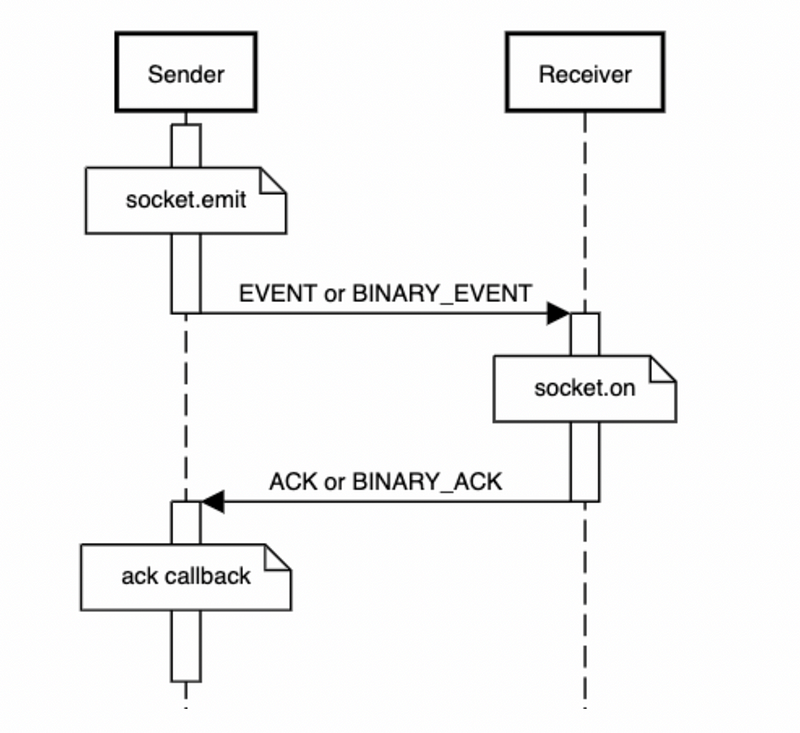
Now in chat.page.ts file, we will deal with socket programming and will explore some of the socket methods (like connect(), emit(), disconnect(), and more). Now you must be wondering what are these events and methods !!
Above all events are defined under the server script, that we will be building in the next steps. So let’s go and build our server…!
Below is the code for the chat.page.ts file:-
In the above code, remember if there is an emit event on the front-end — its listener/subscribe will be on the server. And if there is a listener/subscribe event on the front-end there will be an emit event on the server.
First, we Import [Line 2] and Inject the socket module [Line 15] then we call the connect() function [Line 21] defined under sockets, this step will be used to connect to server socket (don’t worry server script is in a later section, which shows how to make server socket).
Then we simply emit an event called setUserName [Line 22] that sets the name of the user that has entered the Chat Room.
There is also a subscribe for an event named message[Line 25]. This will keep listening to any event emitted from the server with the message event name.
Once the user has entered the Chat Room then to let others know we simply subscribe to an event called usersActivity [Line 30] (that keeps track of any user who has joined or left the Chat Room).
When the user sends the message, we simply emit an event called sendTheMessage [Line 39] with the message content. And when the user closes the chat page disconnect() [Line 44] function is called that simply destroys the connection between the server and app. To understand the other half of this code — server code is necessary, now let's write that.
Step 3:- Creating a new Node JS project
To create a Node JS script, we will create an index.js file and run npm init in the working directory (this will create the package.json file in the project).
$ npm init
The above command will create the package.json file in the working directory and then you can create the index.js file (All logic will be contained by index file). Once you have run the above command, the project structure will look like this:-
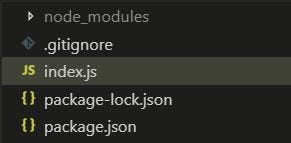
we have to install some of the libraries that will help in implementing node script. To install the libraries run the below command:-
$ npm install cors express socket.io
To know more about cors, express and socket.io you can follow the links. Now we have all the basic requirements to start our node script.
Note — Check your project’s package.json file, it should contain the value stated below in the scripts section, else write it:-

Step 4:- Implementing the Node JS server logic
Now we will be implementing the socket events and methods that will be called from the Ionic 5 chat application. Below is the code for the server script with socket event:-
Now in the above code, we have defined some methods like on and emit. ON is a listener method and is called when some event is received. And emit function is an emitter that returns or fires the value back to the Ionic 5 app.
You can easily understand in code, that .on() have corresponding .emit() in front-end. And .emit() will have corresponding .subscribe() on front-end side. you can match them with event names like “message”, “userActivity”, “setUsername”
Note :- ON is always a receiver of event fired by emit method and emit method fires the event to the ON method (Both sentences are vice-versa). However in Angular ON is replaced by subscribe() method
connection event is a predefined event that is fired when connect() method is called for the front-end side and disconnect event is fired when disconnect() method is called. Other events are user-defined (.i.e. defined by us), So you can change the name according to your convince.
Now you can run the node script locally using the below command, or if you want to deploy the server to Heroku go to this blog. And once you have deployed, you just have to change the URL in the app.module.ts in socket config code.
// code in app.module.ts of chat application
    const config: SocketIoConfig = {
    url:'depolyed_url_if_any or localhost_url',
    options: {}
    };
Command to run the Node JS server locally and use the localhost: port as the URL in the app.module.ts (if you are running the server locally).
$ npm start
Step 5:- Knowing the Flow of the Chat Application.
Once the application starts, enter the name you want to use in the chat room, and if you want to test, open two windows in the browser (this means 2 chat users are there). The above logic is for Open Group chat, the message is broadcasted to the complete channel. It will be seen to everyone logged into the chat screen. Below is the chat screen for one user, log in using a name.

Conclusion
Now we have learned about the socket, you can try to add the socket programming where ever you want the real-time exchange of data (single or multiple nodes). The basic concept of the socket is dependent on the PUSH SUBSCRIBE model, this means there is a channel in which the user pushes the message and everyone subscribed to it will get the pushed message. If you want to know more about any of the features or want to implement them in any of the tech stacks you can go to Enappd Blogs.


