Use TomTom Maps API in Ionic Capacitor App

Using Maps or geolocation is one of the requirements in apps nowadays. If you are an app developer, you must have used Google Maps API for your apps for years. Recently Google has started charging for each Maps API call, and that includes even displaying the map. Even though the charges are very nominal, and comes with a free quota for each API, it limits a small app developer from testing Maps functionality extensively, or a startup to launch an initial free product.
So today we are talking about an alternative — TomTom Maps. It’s a portal that provides free Maps API calls, it has many similar APIs like Google Maps, geofencing, routing etc. TomTom isn’t free either, but it is good to learn about an alternative in case Google increases their rates in near future.
In this tutorial, we will be implementing TomTom maps in an Ionic mobile app, built with Angular and Capacitor.
Ionic, Angular, Capacitor ?
If you are new to hybrid app development, these terms might be new to you. Angular is a famous Javascript front-end framework by Google. You can make very complex web-apps with it. Ionic is a functional and UI wrapper library, which enables easy development of mobile apps with Angular and other similar frameworks (mobile apps with web framework ? Yes !! ) . Finally, Capacitor is the build environment, or tool, which converts this whole “wrapped web-app” in an Android or iOS app.
If you are new to this, you might want to check out beginner tutorials on Ionic and Capacitor.
TomTom Maps
TomTom is a Netherlands based company which works on satellite based navigation services. Earlier in 2012, TomTom was announced as the main mapping data provider for Apple’s revamped iOS 6. They have an impressive presence globally, and a long list of products as well. Only because of popularity of Google Maps, you probably never heard of TomTom Maps.
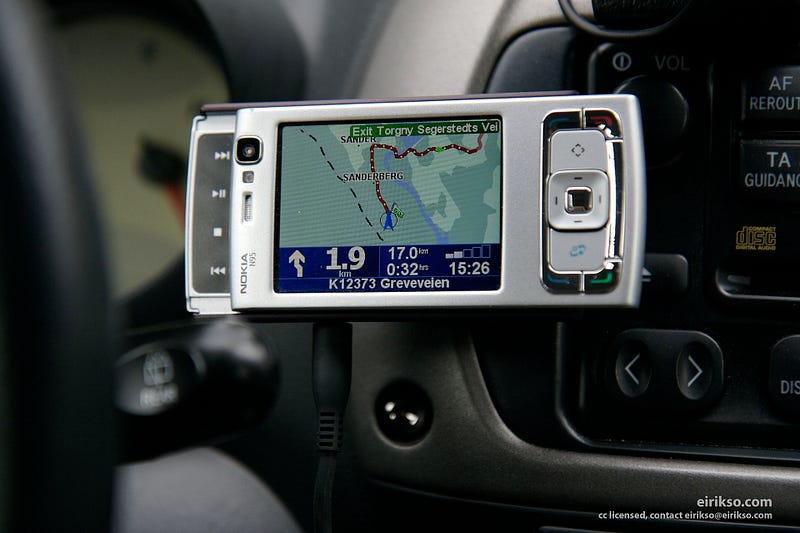
Before going further, we will explore the TomTom Developers portal. Once you visit, you can signup to this portal and you will see the some keys and enabled Products. If you want more features and support you can upgrade to Premium plan also.
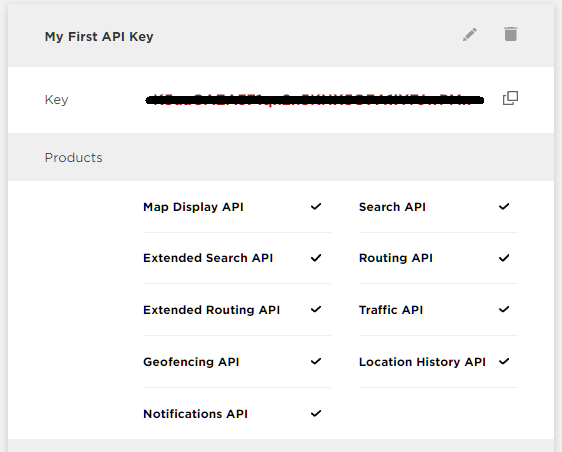
You can see here, we get these free services like Map display API, Geofencing API and other APIs to use. Basically some of these are REST APIs that can be called with required parameters and it will give formatted input. And above Key will be used in initializing the TomTom maps APIs and TomTom JS SDK.
Ways to use
There are two ways by which we can use TomTom Maps API in our Ionic 5 application.
- Using TomTom npm package (Recommended):- It is recommended to use npm package as it includes the SDK into node modules of project. It reduces the project size and is easy to use like any other package.
- Using TomTom Maps SDK :- We can get some version of SDK from TomTom Developers Portal and import that into the
index.htmlfile, just like any other JS file. Then declare thetomtomvariable into a page where you want to show the map.
We will go through both methods using which we will show a map, get our location and show it using a marker. We will setup a fresh Ionic 5 project and implement these Map functionalities into it. In this project we will also go through some REST APIs for searching, geolocation, reverse geolocation and many more. So let’s start and dive into it..!!

Post Structure
The post is broken down in following sections
- Setup new Ionic 5 project
- Implementing Maps using TomTom npm package
- Implement Geolocation and show location on maps
- Reverse Geocoding
- Place search using TomTom fuzzy search API
- Build and test on device
Step 1 — Setup new Ionic 5 project
(You can check out the basic requirements in the beginner blog )
With all requirements met, to create a new Ionic 5 project, run the below command.
$ ionic start tomtom blank --type=angular --capacitor
This will create blank app in the working directory with Angular and Capacitor as the dependencies. Once all dependencies are installed, you can go ahead and run the blank app in browser using
$ ionic serve
Step 2 — Setup TomTom Maps
Install
First of all, we need to install the tomtom maps into the project using below command :-
$ npm i @tomtom-international/web-sdk-maps
This will include the SDK into the node modules and we can use the services by importing them into the required page.
Initialize Map
To import we will use the below code in a page—
import tt from '@tomtom-international/web-sdk-maps';
Above command can give compiler error (Importing error), so to resolve that you can simply add the one line code into the tsconfig.json under compilerOptions.
"allowSyntheticDefaultImports": true
Also, for correct display of markers and other components, you need to include the Maps CSS from TomTom in your index.html as below
<link rel='stylesheet' type='text/css' href='https://api.tomtom.com/maps-sdk-for-web/cdn/5.x/5.37.2/maps/maps.css'/>Render map
After importing we are good to go, we will use the this tt variable to initialize the Maps API. Below is the code to initialize the Maps —
this.map = tt.map({
key: "**Your_Api_Key**", //TomTom, not Google Maps
style: this.mapStyle,
container: "map",
center: this.points,
zoom: 12,
});
The above code can be placed in the initial file app.component.ts or in individual page component.ts, as per your need. Make sure the map is initialized with the above code only after the map div is loaded in the page.
In this above code, we have various attributes —
- Key :- This key can be taken from TomTom developers portal.
- Style :- This defines the map style used while rendering the Map. You can use combination of various style elements. If you want to know more about style you go to TomTom Map Styles. (Optional)
- Container :- In this HTML element ID should be used (rendering the map in HTML).
- Center :- In this we pass the center point [lat, lng] of the map
- Zoom :- This defines the Zoom level of the map. (Optional) This along with Center decides how much map will be visible to us
There are many more values that can be passed into the Maps SDK. To read more on it you can go here.
Once map is initialized into the TS file, we can render the map in HTML file using the ID (defined in container attribute). Below is the HTML script using which, we can do this :-
<div #map id="map"></div>
In this div element, map will show up. But we have to use proper CSS, so that map renders on full screen. Below is the CSS styles using which we can render a full screen map.
#map {
height: calc(100% - 0px);
width: 100vw;
}
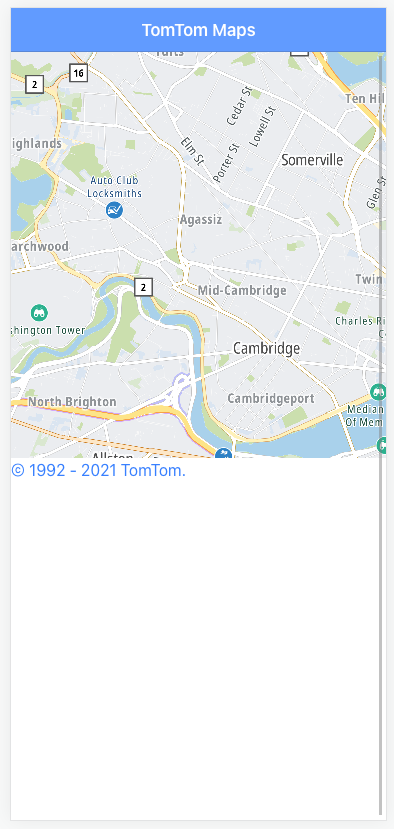
Now you can see Map on View like the below screen. Pretty neat right ? Not as detailed or sharp as Google, but good.
Add Marker
In TomTom package, there is Marker class which can be used to render the marker on Map using coordinates. To add marker to the Map you have to use the map reference to add the marker in specific position. Using below code after map is initialized, we can add the marker in Map.
let marker = new tt.Marker().setLngLat(this.center).addTo(this.map);
where this.center is the LngLat object ({lng:number,lat:number}) for marker coordinates. With this code, the marker will attach itself to the map at the given coordinates. For demo, I have given the marker coordinates same as the center of the map, and it shows like this
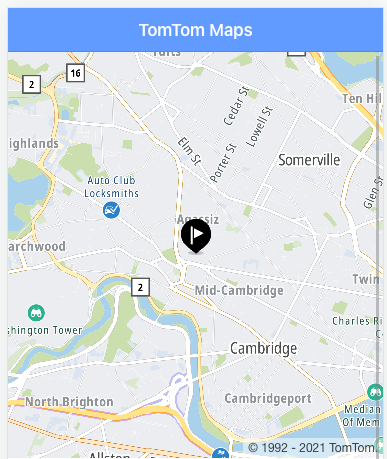
(Read about all Marker related details in official documentation)
Step 3 — Implement Geolocation and show location on maps
So in this tutorial we will set marker for two use cases :-
- To get current location (Using Geolocation Plugin)
- To get nearby searched location (Using Fuzzy search API).
To get the current location, we need a geolocation plugin. Capacitor has in-built geolocation functionality. We can install this using
$ npm install @capacitor/geolocation
Once installed, you can import this plugin in the home.page.ts and get current location using below code
import { Geolocation, Position } from '@capacitor/geolocation'; //importasync someFunction(){
const coordinates:Position = await Geolocation.getCurrentPosition();
console.log('Current position:', coordinates);
}Once the coordinates are received, these can be fed into creating another marker at your current location with different color. The code will be slightly different
let marker2 = new tt.Marker({color:'green'}).setLngLat([coordinates.coords.longitude, coordinates.coords.latitude]).addTo(this.map);The two markers will look like this on the map.
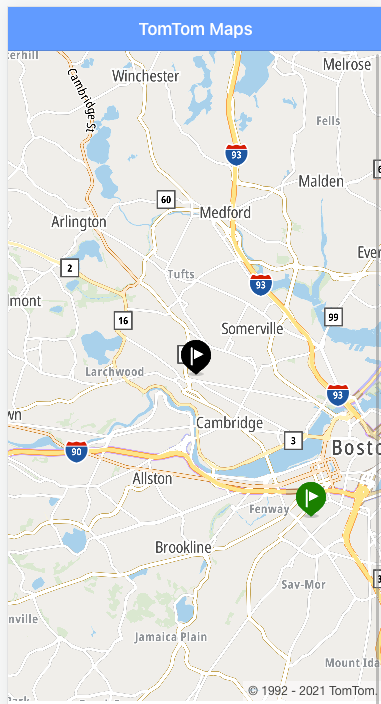
So we didn’t really do Geolocation using TomTom Maps, but the results are same as Google Maps, so I have no complaints 😄
Step 4 — Reverse Geocoding
Next we want to try Reverse Geocoding (Convert coordinate to text address).
In the code we will add the Reverse Geocoding API (TomTom reverse geocoding API). Using Below code we can get text address of location (using lat and lng). For demo purpose, let’s feed the location obtained from Geolocation. (Notice the use of HttpClient, this should be imported in home.page.module as well)
import { HttpClient } from '@angular/common/http'; getAddress(currentLocation){
const res: any = await this.http.get(`https://api.tomtom.com/search/2/reverseGeocode/${currentLocation.latitude}%2C${currentLocation.longitude}.json?key=**your_api_key**`).toPromise();this.reverseGeoCoded = res.addresses[0].address.freeformAddress + ' ' + res.addresses[0].address.countryCodeISO3; }
reverseGeoCoded variable will contain the string of address and we will render it on the screen.
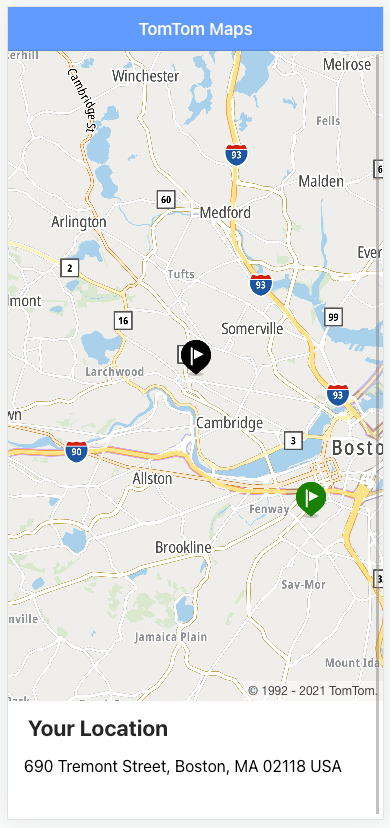
Step 5 — Place search using TomTom fuzzy search API
Now we are done with Geolocation and Reverse Geolocation, so let’s start with getting nearby search address and setting marker to location to selected location.
First to get the Nearby places search we will use the TomTom fuzzy search API. We can search point of interests (POI) with this API by supplying to it
- The search term e.g. pizza, gas station etc.
- The location around which we want to search
There are many more options you can provide for this search. You can read more about the possible options in theofficial documentation.
Below is the API call for fuzzy search :-
async search() {
const coordinates: Position =
await Geolocation.getCurrentPosition();
const res: any =
await this.http.get (`https://api.tomtom.com/search/2/search/${this.query}.json? lat=${coordinates.coords.latitude}&lon=${coordinates.coords.longitude}&key=**your_api_key**`).toPromise();console.log(res.results); }
The query parameter in the above search is the search term we supply (I used ‘pizza’ as search term). Also, the coordinates are the result from my current location. This will return the nearby places result.
We get the following results in a JSON format, and I displayed them on the screen.
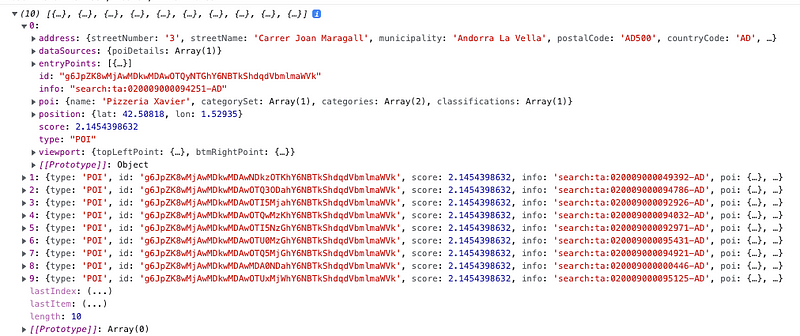
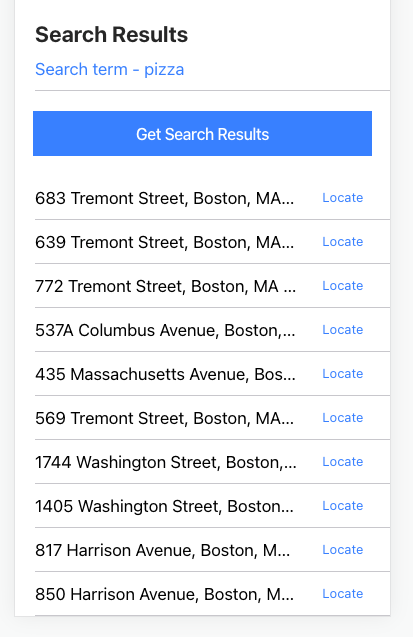
Locate the search result
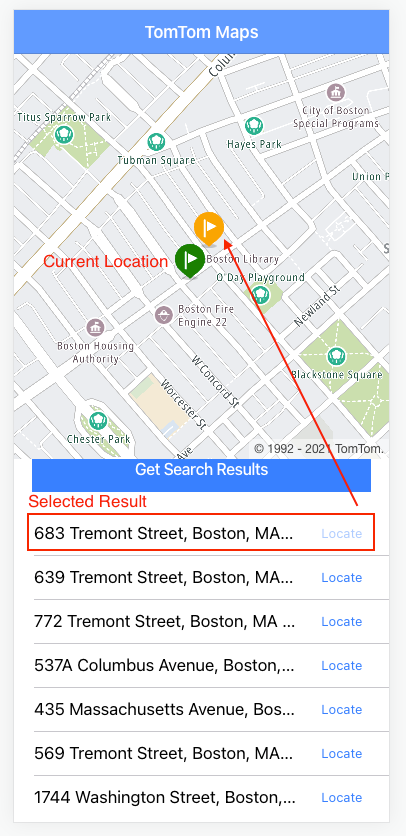
Going one step ahead, we can locate these search results on the map by clicking on the result, and marking the location with a marker. We will also center the map on that location for better UX.
Following function receives the result data from a button click, and then changes Map’s center to the result location, displays a marker there and sets zoom to 15 for better visibility.
locateResult(place) {
this.searchResultMarker = new tt.Marker({ color: 'orange' }).setLngLat([place.position.lon, place.position.lat]).addTo(this.map);
this.map.setCenter({ lng: place.position.lon, lat: place.position.lat });this.map.setZoom(15); }
Now when we click on any of the results, we will get a marker placed in the zoomed in map with the result location (Orange color). Notice how close this is to the current location, which means the API is actually giving good results.
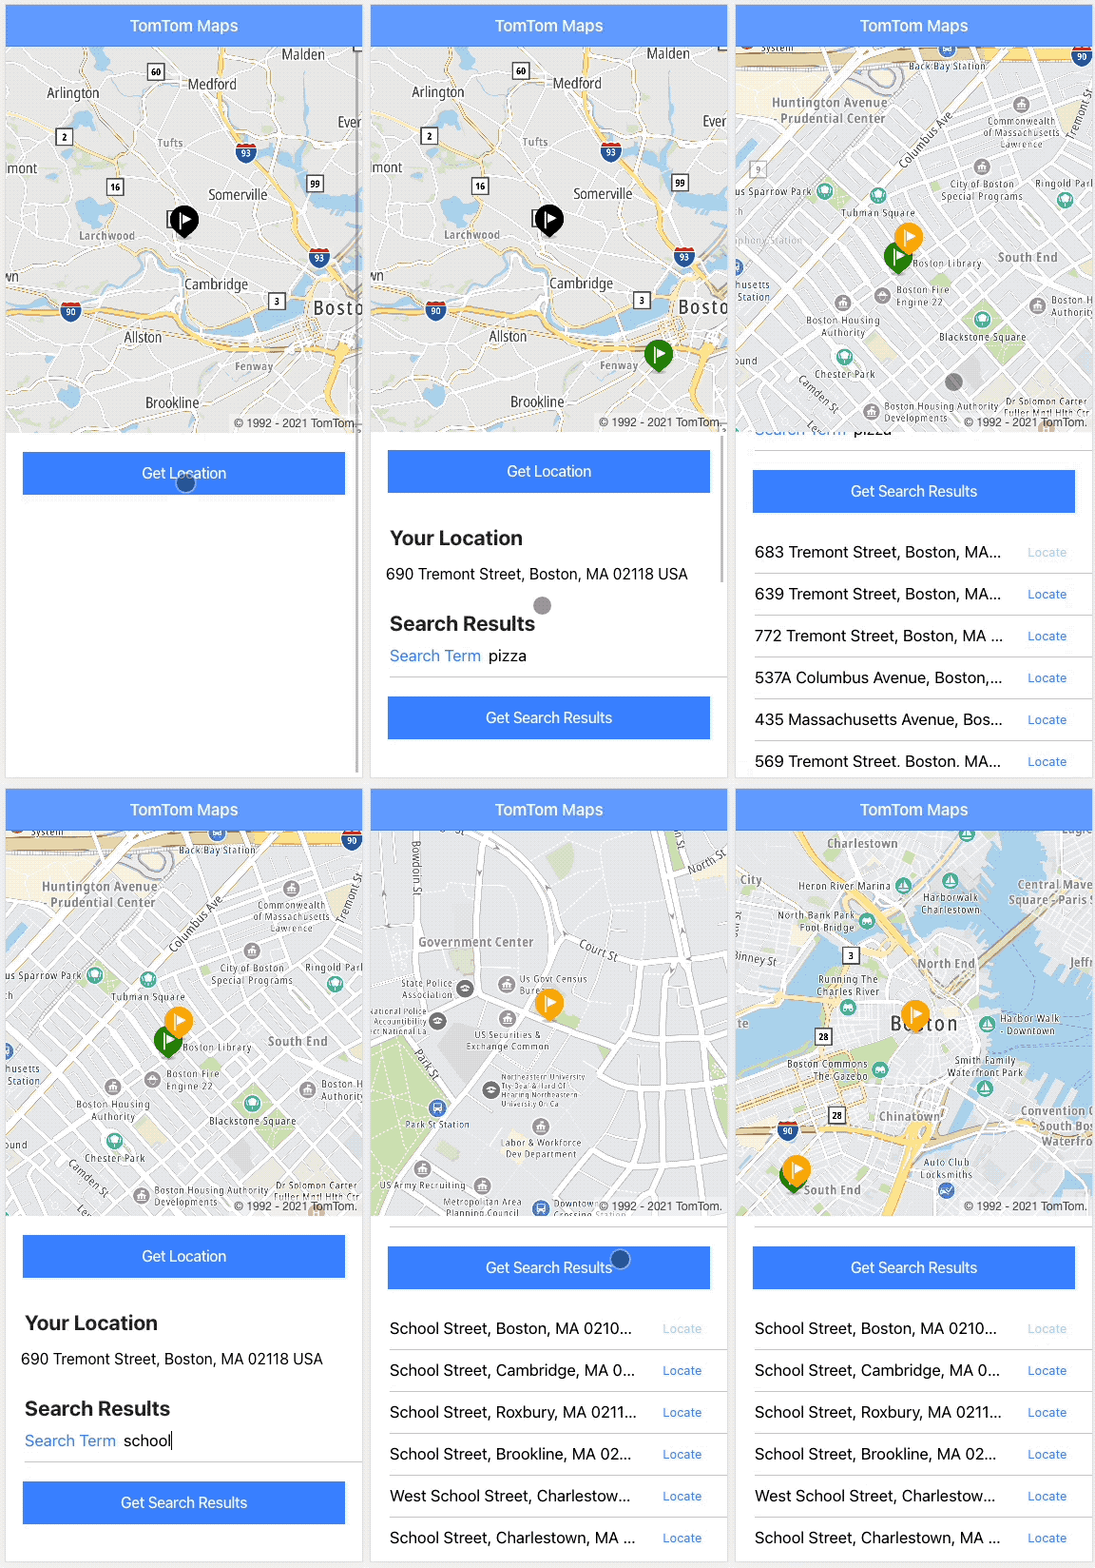
The following GIF shows the complete working of TomTom maps and the functionality we built in Ionic Capacitor App.
Step 6 — Build and test on device
Create and configure platform
To build the app on Android, run these commands
// Install @capacitor/android
$ npm install @capacitor/android
// Add android platform
$ npx cap add android
// Copy all changes to Android platform
$ npx cap sync
// Open the project in Android studio
$ npx cap open android
Also, add these permissions in AndroidManifest.xml
<uses-permission android:name="android.permission.ACCESS_COARSE_LOCATION" /> <uses-permission android:name="android.permission.ACCESS_FINE_LOCATION" /> <uses-feature android:name="android.hardware.location.gps" />
Note: As of Capacitor 3.0, you do not need to add the plugin in the MainActivity.java fileWith the above settings done, if you build your app in an Android device using Android studio, you will get the same results as the GIF shown in previous section.
Complete code of the app looks like this
Conclusion
Congratulations ! You are now not dependent on Google Maps API. You now know how to use TomTom Maps in your Ionic Capacitor apps.
We learnt how we can use the TomTom Maps and several different features like geolocation, reverse geolocation and near-by search. If you want to explore more about TomTom API’s, you can go to the TomTom Portal.
To know more about interesting Ionic/ Capacitor features and concepts you can go to Enappd Blogs.


